文章目录
如何用Java给图片添加文字水印
最近做的项目需要实现为视频添加图片水印,在网上查找和实践后,实现了功能,特此记录一下,方便日后用到。本文用的是从海康摄像头拿到的视频流,添加图片后编译成rtmp视频流,在IE浏览器中可以看到(在谷歌浏览其中打开没画面,不知道为什么),技术使用springboot+vue+ffmpeg+nginx+nginx的rtmp模块
1.首先
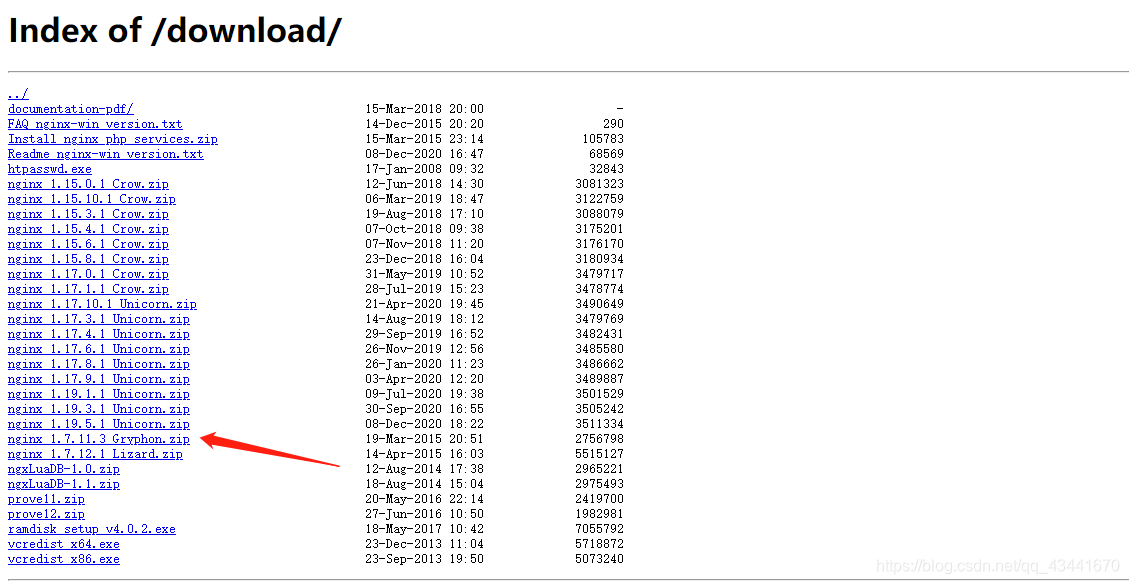
下载nginx

然后
下载nginx rtsp 模块

下载压缩包解压到nginx的根目录下

然后打开nginx目录下的conf,如果里面没有nginx.conf就重下一个其他包把下面的配置文件拿过来放在conf下面

然后双击nginx目录下的nginx.exe就可以启动nginx啦,打开浏览器输入127.0.0.1就可以看到成功页面

然后再nginx.conf中添加如下配置
rtmp{
	server{
	    listen 1935;
        #转发的地址
		application live{
            live on;
            record off;
		}
		application hls{
            live on;
            hls on;
            hls_path nginx-rtmp-module/hls;
            hls_cleanup off;
		}
	}
}
cmd 切换到nginx目录下面 nginx.exe -s reload
重新加载nginx配置文件 nginx配置结束
2.
下载ffmpeg
链接:https://pan.baidu.com/s/1LUWeVnM8Ig-2b2ubAw3t1A
提取码:1234
解压后在环境变量path中添加目录地址即可
打开cmd,输入ffmpeg -version,可以查看是否安装成功

使用ffmpeg命令
ffmpeg -i “rtsp流路径” -vcodec copy -acodec copy -f flv “rtmp://127.0.0.1:1935/live/”即可对视频进行操作
具体操作如下
3.用Java操作视频
首先controller层
public class Video {
	/**海康摄像头rtsp格式说明:
	 * ffmpegPath:ffmpeg的安装地址(xx\\xx\\ffmpeg.exe)
	 * rtsp://[username]:[password]@[ip]:[port]/[codec]/[channel]/[subtype]/av_stream
	 * username: 用户名。例如admin。
	 * password: 密码。例如12345。
	 * ip: 为设备IP。例如 192.0.0.64。
	 * port: 端口号默认为554,若为默认可不填写。
	 * codec:有H.264、MPEG-4、mpeg4这几种。
	 * channel: 通道号,起始为1。例如通道1,则为ch1。
	 * subtype: 码流类型,主码流为main,辅码流为sub
	 * logo:添加图片水印的图片(注意windows下面的logo地址前面要写4个反斜杠如:D\\\\:/html/3.png;linux下logo水印路径:/tmp/TVLOG.png)
	 * xaxis:水印的x轴距离(左上角为原点)
	 * yaxis:水印的y轴距离(左上角为原点)
	 */
	@RequestMapping(value = "/waterMark",method = RequestMethod.POST)
	@ResponseBody
	public CommonResult waterMark(@RequestBody Map<String,String> map){
		log.info("进入视频添加水印的方法");
		String ffmpegPath =map.get("ffmpegPath");
		String username = map.get("username");
		String password = map.get("password");
		String ip = map.get("ip");
		String port = map.get("port");
		String codec = map.get("codec");
		String channel = map.get("channel");
		String subtype = map.get("subtype");
		String logo = map.get("logo");
		String xaxis = map.get("xaxis");
		String yaxis = map.get("yaxis");
		if (StrUtil.isEmpty(ffmpegPath)){
			return ResultUtils.error(-1,"ffmpeg.exe地址不能为空");
		}else if (StrUtil.isEmpty(username)){
			return ResultUtils.error(-1,"摄像头用户名不能为空");
		}else if (StrUtil.isEmpty(password)){
			return ResultUtils.error(-1,"摄像头密码不能为空");
		}else if (StrUtil.isEmpty(ip)){
			return ResultUtils.error(-1,"摄像头ip不能为空");
		}else if (StrUtil.isEmpty(port)){
			return ResultUtils.error(-1,"摄像头端口号不能为空");
		}else if (StrUtil.isEmpty(codec)){
			return ResultUtils.error(-1,"摄像头的codec不能为空");
		}else if (StrUtil.isEmpty(channel)){
			return ResultUtils.error(-1,"摄像头通道号不能为空");
		}else if (StrUtil.isEmpty(subtype)){
			return ResultUtils.error(-1,"码流类型不能为空");
		}
		HashMap<String, String>dto=new HashMap<String, String>();
		dto.put("ffmpegPath",ffmpegPath);
		dto.put("username",username);
		dto.put("password",password);
		dto.put("ip",ip);
		dto.put("port",port);
		dto.put("codec",codec);
		dto.put("channel",channel);
		dto.put("subtype",subtype);
		dto.put("logo",logo);
		dto.put("xaxis",xaxis);
		dto.put("yaxis",yaxis);
		String secondsString=  new VideoUtils().videoTransfer(dto);
		log.info("转换共用:"+secondsString+"秒");
		return ResultUtils.success();
	}
}
工具类
public class VideoUtils {
	public static String exec(List<String> cmd) {
		String converted_time = null;
		Process proc =null;
		BufferedReader stdout = null;
		try {
			ProcessBuilder builder = new ProcessBuilder();
			builder.command(cmd);
			builder.redirectErrorStream(true);
			proc = builder.start();
			stdout = new BufferedReader(new InputStreamReader(proc.getInputStream()));
			String line;
			int lineNumber=1;
			List<String> returnStringList = new LinkedList<String>();
			while ((line = stdout.readLine()) != null) {
				System.out.println("第"+lineNumber+"行:"+line);
				lineNumber=lineNumber+1;
					returnStringList.add(dealString(line));
			}
			String info = "";
			for (int i = returnStringList.size() - 1; i >= 0; i--) {
				if (null != returnStringList.get(i)	&& returnStringList.get(i).startsWith("frame=")) {
					info = returnStringList.get(i);
					break;
				}
			}
			if (null != info) {
				converted_time = info.split("time=")[1].split("bitrate=")[0].trim();
			}
		} catch (IndexOutOfBoundsException ex) {
			converted_time = null;
		} catch (Exception e) {
			e.printStackTrace();
		}finally{
			try {
				proc.waitFor();
				stdout.close();
			} catch (Exception e) {
				e.printStackTrace();
			}
		}
		return converted_time;
	}

	/**
	 * 判断返回内容通过正则表达式判断
	 * @param str
	 * @return
	 */
	public static String dealString( String str ){
		Matcher m=java.util.regex.Pattern.compile("^frame=.*" ).matcher(str);
		String msg="";
		while (m.find()){
			msg = m.group();
		}
		return msg;
	}

	/**
	 *  如果返回不是null的值就是成功(值为转换用时单位:秒)
	 * @param instr
	 * @return
	 */
	public static String returnSecond(String instr){
		String returnValue=null;
		if (null!=instr) {
			String[] a=instr.split("\\.");
			String[] b=a[0].split(":");
			int returnNumber=0;
			if (null!=instr&&b[0].length()!=0) {
				returnNumber=Integer.valueOf(b[0])*60*60 + Integer.valueOf(b[1])*60 + Integer.valueOf(b[2]);
				returnValue=String.valueOf(returnNumber);
			}else{
				returnValue=null;
			}
		}
		return returnValue;
	}

	/**
	 * @ HashMap<String,String> dto 参数传递对象<br>
	 * dto中包含的参数<br>
	 * (必填)1.ffmpeg_path:ffmpeg执行文件地址,如 d:\\ffmpeg\\ffmpeg.exe Linux下直接调用ffmpeg命令(当然你事先已经有这个程序了)<br>
	 * (必填)2.input_path:原视频路径<br>
	 * (必填)3.video_converted_path:转换后视频输出路径<br>
	 * (可选)4.screen_size:视频尺寸 长度乘宽度 乘号用英文小写"x"如 512x480<br>
	 * (可选)5.logo:水印地址(其实在ffmpeg中有一个专门的watermark参数,logo跟它有何不同,我还没看,不过对我来说效果一样 貌似需要png图片才行)<br>
	 * (可选,如果填写必须有logo才行,默认为0)6.xaxis:水印logo的横坐标(只有logo参数为一个正确路径才行) 比如0<br>
	 * (可选,如果填写必须有logo才行,默认为0)6.yaxis:水印logo的纵坐标(只有logo参数为一个正确路径才行) 比如0<br>
	 * (可选)vb:视频比特率,传入一个数值,单位在程序里面拼接了k
	 * (可选)ab:音频比特率,传入一个数值,单位在程序里面拼接了k
	 */
	public String videoTransfer(HashMap<String, String> dto){
		List<String> cmd = new ArrayList<String>();
		cmd.add(dto.get("ffmpegPath"));
		//-y: 覆盖已经存在的输出文件
		cmd.add("-y");
		//-i: 指定输入文件
		cmd.add("-i");
		String str ="\"rtsp://"+dto.get("username")+":"+dto.get("password")+"@"+dto.get("ip")+":"
				+dto.get("port")+"/"+dto.get("codec")+"/"+dto.get("channel")+"/"+dto.get("subtype")+"/av_stream\"";
		cmd.add(str);
		//图片水印
		if (null!=dto.get("logo")) {
			String logo=dto.get("logo");
			cmd.add("-vf");
			String xaxis=dto.get("xaxis");
			String yaxis=dto.get("yaxis");
			xaxis=xaxis!=null&&!xaxis.equals("")?xaxis:"0";
			yaxis=yaxis!=null&&!yaxis.equals("")?yaxis:"0";
			String logoString="movie="+logo+"[logo],[in][logo]overlay=x="+xaxis+":y="+yaxis+"[out]";
			cmd.add(logoString);
			cmd.add("\"-\"vcodec copy -vcodec libx264 -f flv \"rtmp://127.0.0.1:1935/live/\"");
		}
		log.info("list中的内容 -> {}"+cmd);
		String converted_time= VideoUtils.exec(cmd);
		//获取转换时间(如果是一段视频的话,则会有时间,如果是从摄像头拿到的视频的话,则会一直编辑下去,没有返回时间)
		return VideoUtils.returnSecond(converted_time);
	}
}
4. vue中编写
首先需要下载插件
npm install --save vue-video-player
npm install --save videojs-flash
下载video-js.swf
这是个文件,直接放在static中即可

index.vue界面
<template>
  <video-player  class="video-player vjs-custom-skin"
                 ref="videoPlayer"
                 :playsinline="true"
                 :options="playerOptions"
  ></video-player>
</template>
<script>
export default {
  name: 'waterMark',
  data() {
    return {
      // 视频播放
      playerOptions: {
        playbackRates: [0.7, 1.0, 1.5, 2.0], //播放速度
        autoplay: true, //如果true,浏览器准备好时开始回放。
        muted: false, // 默认情况下将会消除任何音频。
        loop: false, // 导致视频一结束就重新开始。
        preload: 'auto', // 建议浏览器在<video>加载元素后是否应该开始下载视频数据。auto浏览器选择最佳行为,立即开始加载视频(如果浏览器支持)
        language: 'zh-CN',
        aspectRatio: '16:7', // 将播放器置于流畅模式,并在计算播放器的动态大小时使用该值。值应该代表一个比例 - 用冒号分隔的两个数字(例如"16:9"或"4:3")
        techOrder: ['flash', 'html5'],      // 兼容顺序
        flash: {
          hls: {withCredentials: false},
          swf: 'static/video-js.swf' // 引入静态文件swf
        },
        html5: {hls: {withCredentials: false}},
        sources: [{ // 流配置,数组形式,会根据兼容顺序自动切换
          type: 'rtmp/flv',
          src: 'rtmp://127.0.0.1:1935/live/'
        }],
        poster: "", //你的封面地址
        // width: document.documentElement.clientWidth,
        notSupportedMessage: '此视频暂无法播放,请稍后再试', // 允许覆盖Video.js无法播放媒体源时显示的默认信息。
        controlBar: {
          timeDivider: true,
          durationDisplay: true,
          remainingTimeDisplay: false,
          fullscreenToggle: true  //全屏按钮
        }
      }
    }
  }
}
</script>
注意src中的rtmp地址后要加/

5.测试
一切准备就绪开始测试,拿到摄像头的rtsp地址用vlc软件测试,正常可以打开,

效果视频

到此结束。