双目参数文件详解 (万能P2/Pr) 1
Camera.fx /fy.cx,cy ;2 Camera.bf ; 3 P2(4)/1000 ; 4 ThDepth=50/20
a. Camera.bf中的b指基线baseline(单位:米),
f是焦距fx(x轴和y轴差距不大)
,bf=b*f=T(1)*Camera.fx=P2(4)/1000,
和ThDepth一起决定了深度点的范围:
bf * ThDepth / fx
即大致为b * ThDepth。
基线在双目视觉中出现的比较多,
如ORB-SLAM中的双目示例中的EuRoC.yaml中的bf为47.9,ThDepth为35,fx为435.2,
则有效深度为bf * ThDepth / fx = 47.9*35/435.3=3.85米;
KITTI.yaml中的bf为387.57,ThDepth为40,fx为721.54,
则有效深度为387.57*40/721.54=21.5米。
这里的xtion的IR基线(其实也可以不这么叫)bf为40,
ThDepth为50,fx为558.34,则有效深度为3.58米(官方为3.5米)。
Camera.bf这个参数是个大坑,其为相机的
基线×相机的焦距
。
orbslam的参数文件中单位是m
而opencv标定文件中的单位是mm
# stereo
baseline
times
fx
Camera.bf: 78.9108236
-1.6275078772819168e+03
*
4.8485678458503560e+02
=
-7.8911e+05
intrinsics.yml
M1: !!opencv-matrix
rows: 3
cols: 3
dt: d
data: [
4.8485678458503560e+02,
0., 3.1984271341779277e+02, 0.,
4.7849342106773673e+02, 2.4258677342694295e+02, 0., 0., 1. ]
————————————————
extrinsics.yml
T: !!opencv-matrix
rows: 3
cols: 1
dt: d
data: [
-1.6275078772819168e+03
, -2.3257053592704903e+01,
2.8278971161131913e+01 ]
————————————————
LEFT.P:=P1:
RIGHT.P:=P2:
RIGHT.P: !!opencv-matrix
rows: 3
cols: 4
dt: d
data: [ 3.9018919929094244e+02, 0., 3.3265590286254883e+02,
-6.3519667606988060e+05
, 0., 3.9018919929094244e+02, 2.3086411857604980e+02, 0., 0., 0., 1., 0. ]
__________ ,
-6.3519667606988060e+05
=T[1]*P2[1]=-1.6275078772819168e+03*3.9018919929094244e+02 = -6.3504e+05
——
是EROC基线吧
—————
T: !!opencv-matrix
rows: 3
cols: 1
dt: d
data: [ -1.6275078772819168e+03, -2.3257053592704903e+01,
2.8278971161131913e+01 ]
————————————————
# Close/Far threshold. Baseline times.
ThDepth: 50
双目相机标定和orbslam2双目参数详解
一,对标orb_slam2 的双目摄像机标定程序(广角、平角都可)
经实测,opencv sample里面自带的双目标定程序(stereo_clib.cpp),对平角相机效果较好,如果你是平角相机跳过本段,直接查看ORBSLAM2的双目配置参数,而stereo_clib.cpp对广角相机效果奇差。
故十里桃园综合了很多帖子,再根据经验给出下述双目代码(基于opencv342测试 opencv3 vs各版本下载地址: 链接: https://pan.baidu.com/s/1f5oAFqs-u15vkD5LNTcxtw 提取码: 2qj9),另用vs19跑程序时有无相应现象,应为vs19bug,在linux下实测可行:
这里要强调的是,双目切勿左右搞反,可对照opencv给出的左右图像来确定自己是否搞反。
再说明一点:请保证图像序号的连续,还要保证图像序列中没有找不到角点的图像。程序会有提示没有成功找到角点的图像序号,删除,重新对图像编号。保证图像序号的连续。图像序号从 1 开始 ,代码中的frameNumber 设置为 你图像序号最大值 +1,如十里桃园一共用58图像序列,则设为59.
先自行标定左右相机的单目畸变参数,填入下面代码中的初始化参数,楼主用的kalibr标定的单目,opencv也可以标定,这个自己解决。
说明一点,单目预标定没必要标的很精确,差不多就成,当然标的精确更好,畸变参数4,5个都可以,单目的所有预标定参数将在下面的代码中进行迭代优化。
修改你的棋盘信息 纵横角点数 还有每个格子的大小 单位mm
广角双目标定代码如下:
#include “opencv2/core/core.hpp”
#include “opencv2/imgproc/imgproc.hpp”
#include “opencv2/calib3d/calib3d.hpp”
#include “opencv2/highgui/highgui.hpp”
#include <vector>
#include <string>
#include <algorithm>
#include <iostream>
#include <iterator>
#include <stdio.h>
#include <stdlib.h>
#include <ctype.h>
#include <opencv2/opencv.hpp>
#include “cv.h”
#include <cv.hpp>
using namespace std;
using namespace cv;
const int imageWidth = 640;
const int imageHeight = 480;
const int boardWidth = 11;
//横向的角点数目
const int boardHeight = 8;
//纵向的角点数据
const int boardCorner = boardWidth * boardHeight;
//总的角点数据
//相机标定时需要采用的图像帧数
const int squareSize = 49.27;
//标定板黑白格子的大小单位mm
const int frameNumber = 59;
//图像命名 从1 ~ 58(59-1=58)
string folder_ = “./data/”;
string format_R = “R”;
string format_L = “L”;
//例如: R1.jpg L58.jpg 置于工程目录的 data文件夹下,
const Size boardSize = Size(boardWidth, boardHeight);
//标定板的总内角点
Size imageSize = Size(imageWidth, imageHeight);Mat R, T, E, F;
//R 旋转矢量 T平移矢量 E本征矩阵 F基础矩阵
vector<Mat> rvecs;
//旋转向量
vector<Mat> tvecs;
//平移向量
vector<vector<Point2f>>
imagePointL;
//左边摄像机所有照片角点的坐标集合
vector<vector<Point2f>> imagePointR;
//右边摄像机所有照片角点的坐标集合
vector<vector<Point3f>> objRealPoint;
//各副图像的角点的实际物理坐标集合
vector<Point2f> cornerL;
//左边摄像机某一照片角点坐标集合
vector<Point2f> cornerR;
//右边摄像机某一照片角点坐标集合
Mat rgbImageL, grayImageL;
Mat rgbImageR, grayImageR;
Mat Rl, Rr, Pl, Pr, Q;
//校正旋转矩阵R,
投影矩阵P
重投影矩阵Q (下面有具体的含义解释)
Mat mapLx, mapLy, mapRx, mapRy;
//映射表
Rect validROIL, validROIR;
//图像校正之后,会对图像进行裁剪,这里的validROI就是指裁剪之后的区域
/*事先标定好的左相机的内参矩阵
fx 0 cx
0 fy cy
0 0 1*/
Mat cameraMatrixL = (Mat_<double>(3, 3) << 296.65731645541695, 0, 343.1975436071541,
0, 300.71016643747646, 246.01183552967473,
0, 0, 1);
//这时候就需要你把左右相机单目标定的参数给写上
//获得的畸变参数
Mat distCoeffL = (Mat_<double>(4, 1) << -0.23906272129552558, 0.03436102573634348, 0.001517498429211239, -0.005280695866378259);
/*事先标定好的右相机的内参矩阵
fx 0 cx
0 fy cy
0 0 1*/
Mat cameraMatrixR = (Mat_<double>(3, 3) << 296.92709649579353, 0, 313.1873142211607,
0, 300.0649937238372, 217.0722185756087,
0, 0, 1);
Mat distCoeffR = (Mat_<double>(4, 1) << -0.23753878535018613, 0.03338842944635466, 0.0026030620085220105, -0.0008840126895030034);
void calRealPoint(vector<vector<Point3f>>& obj, int boardwidth, int boardheight, int imgNumber, int squaresize)
{
vector<Point3f> imgpoint;
for (int rowIndex = 0; rowIndex < boardheight; rowIndex++)
{
for (int colIndex = 0; colIndex < boardwidth; colIndex++)
{
imgpoint.push_back(Point3f(rowIndex * squaresize, colIndex * squaresize, 0));
}
}
for (int imgIndex = 0; imgIndex < imgNumber; imgIndex++)
{
obj.push_back(imgpoint);
}
}
void outputCameraParam(void)
{ /*保存数据*/ /*输出数据*/
FileStorage fs(“intrinsics.yml”, FileStorage::WRITE);
//文件存储器的初始化
if (fs.isOpened())
{
fs << “cameraMatrixL” << cameraMatrixL << “cameraDistcoeffL” << distCoeffL << “cameraMatrixR” << cameraMatrixR << “cameraDistcoeffR” << distCoeffR;
fs.release();
cout << “cameraMatrixL=:” << cameraMatrixL << endl << “cameraDistcoeffL=:” << distCoeffL << endl << “cameraMatrixR=:” << cameraMatrixR << endl << “cameraDistcoeffR=:” << distCoeffR << endl;
}
else
{
cout << “Error: can not save the intrinsics!!!!!” << endl;
}
fs.open(“extrinsics.yml”, FileStorage::WRITE);
if (fs.isOpened())
{
fs << “R” << R << “T” << T << “Rl” << Rl << “Rr” << Rr << “Pl” << Pl << “Pr” << Pr << “Q” << Q;
cout << “R=” << R << endl << “T=” << T << endl << “Rl=” << Rl << endl << “Rr=” << Rr << endl << “Pl=” << Pl << endl << “Pr=” << Pr << endl << “Q=” << Q << endl;
fs.release();
}
else
cout << “Error: can not save the extrinsic parameters\n”;
}
int main(int argc, char* argv[])
{
Mat img;
int goodFrameCount = 1;
cout << “Total Images:” << frameNumber << endl;
while (goodFrameCount < frameNumber)
{
cout <<“Current image :” << goodFrameCount << endl;
string filenamel,filenamer;
//char filename[100];
/*读取左边的图像*/
filenamel = folder_ + format_L+ to_string(goodFrameCount)+”.jpg”;
rgbImageL = imread(filenamel, CV_LOAD_IMAGE_COLOR);
cvtColor(rgbImageL, grayImageL, CV_BGR2GRAY);
/*读取右边的图像*/
//sprintf_s(filename, “D:/dual_camera_clibration/dual/R%d.jpg”, goodFrameCount );
filenamer = folder_ + format_R+ to_string(goodFrameCount)+”.jpg”;
rgbImageR = imread(filenamer, CV_LOAD_IMAGE_COLOR);
cvtColor(rgbImageR, grayImageR, CV_BGR2GRAY);
bool isFindL, isFindR;
isFindL = findChessboardCorners(rgbImageL, boardSize, cornerL);
isFindR = findChessboardCorners(rgbImageR, boardSize, cornerR);
if (isFindL == true && isFindR == true)
//如果两幅图像都找到了所有的角点 则说明这两幅图像是可行的
{
cornerSubPix(grayImageL, cornerL, Size(5, 5), Size(-1, -1), TermCriteria(CV_TERMCRIT_EPS | CV_TERMCRIT_ITER, 20, 0.1));
drawChessboardCorners(rgbImageL, boardSize, cornerL, isFindL);
imshow(“chessboardL”, rgbImageL);
imagePointL.push_back(cornerL);
cornerSubPix(grayImageR, cornerR, Size(5, 5), Size(-1, -1), TermCriteria(CV_TERMCRIT_EPS | CV_TERMCRIT_ITER, 20, 0.1));
drawChessboardCorners(rgbImageR, boardSize, cornerR, isFindR);
imshow(“chessboardR”, rgbImageR);
imagePointR.push_back(cornerR);
goodFrameCount++;
cout << “The image” << goodFrameCount << ” is good” << endl;
}
else
{
cout << “The image “<< goodFrameCount <<“is bad please try again” << endl;
goodFrameCount++;
}
if (waitKey(10) == ‘q’)
{
break;
}
}
/* 计算实际的校正点的三维坐标 根据实际标定格子的大小来设置 */
calRealPoint(objRealPoint, boardWidth, boardHeight, frameNumber-1, squareSize);
cout << “cal real successful” << endl;
/* 标定摄像头 由于左右摄像机分别都经过了单目标定 所以在此处选择flag = CALIB_USE_INTRINSIC_GUESS */
double rms = stereoCalibrate(objRealPoint, imagePointL, imagePointR,
cameraMatrixL, distCoeffL,
cameraMatrixR, distCoeffR,
Size(imageWidth, imageHeight), R, T, E, F, CV_CALIB_USE_INTRINSIC_GUESS,
TermCriteria(TermCriteria::COUNT + TermCriteria::EPS, 80, 1e-5));
cout << “Stereo Calibration done with RMS error = ” << rms << endl;
stereoRectify(cameraMatrixL, distCoeffL, cameraMatrixR, distCoeffR, imageSize, R, T, Rl, Rr, Pl, Pr, Q, CALIB_ZERO_DISPARITY, -1, imageSize, &validROIL, &validROIR);
initUndistortRectifyMap(cameraMatrixL, distCoeffL, Rl, Pr, imageSize, CV_32FC1, mapLx, mapLy);
initUndistortRectifyMap(cameraMatrixR, distCoeffR, Rr, Pr, imageSize, CV_32FC1, mapRx, mapRy);
Mat rectifyImageL, rectifyImageR;
cout << “debug”<<endl;
for (int num = 1; num < frameNumber;num++)
{
string filenamel,filenamer;
filenamel = folder_ + format_L+ to_string(num)+”.jpg”;
filenamer = folder_ + format_R+ to_string(num)+”.jpg”;
rectifyImageL = imread(filenamel);
rectifyImageR = imread(filenamer);
imshow(“Rectify Before”, rectifyImageL);
/* 经过remap之后,左右相机的图像已经共面并且行对准了 */
Mat rectifyImageL2, rectifyImageR2;
remap(rectifyImageL, rectifyImageL2, mapLx, mapLy, INTER_LINEAR);
remap(rectifyImageR, rectifyImageR2, mapRx, mapRy, INTER_LINEAR);
imshow(“rectifyImageL”, rectifyImageL2);
imshow(“rectifyImageR”, rectifyImageR2);
/*保存并输出数据*/
outputCameraParam();
/* 把校正结果显示出来 把左右两幅图像显示到同一个画面上 这里只显示了最后一副图像的校正结果。并没有把所有的图像都显示出来 */
Mat canvas; double sf;
int w, h;
sf = 600. / MAX(imageSize.width, imageSize.height);
w = cvRound(imageSize.width * sf);
h = cvRound(imageSize.height * sf);
canvas.create(h, w * 2, CV_8UC3);
/*左图像画到画布上*/
Mat canvasPart = canvas(Rect(w * 0, 0, w, h));
//得到画布的一部分
resize(rectifyImageL2, canvasPart, canvasPart.size(), 0, 0, INTER_AREA);
//把图像缩放到跟canvasPart一样大小
Rect vroiL(cvRound(validROIL.x*sf), cvRound(validROIL.y*sf), //获得被截取的区域
cvRound(validROIL.width*sf), cvRound(validROIL.height*sf));
rectangle(canvasPart, vroiL, Scalar(0, 0, 255), 3, 8);
//画上一个矩形
cout << “Painted ImageL” << endl;
/*右图像画到画布上*/
canvasPart = canvas(Rect(w, 0, w, h));
//获得画布的另一部分
resize(rectifyImageR2, canvasPart, canvasPart.size(), 0, 0, INTER_LINEAR);
Rect vroiR(cvRound(validROIR.x * sf), cvRound(validROIR.y*sf),
cvRound(validROIR.width * sf), cvRound(validROIR.height * sf));
rectangle(canvasPart, vroiR, Scalar(0, 255, 0), 3, 8); cout << “Painted ImageR” << endl;
/*画上对应的线条*/
for (int i = 0; i < canvas.rows; i += 16)
line(canvas, Point(0, i), Point(canvas.cols, i), Scalar(0, 255, 0), 1, 8);
imshow(“rectified”, canvas);
//cout << “wait key” << endl;
waitKey(); //system(“pause”);
}
return 0;
}
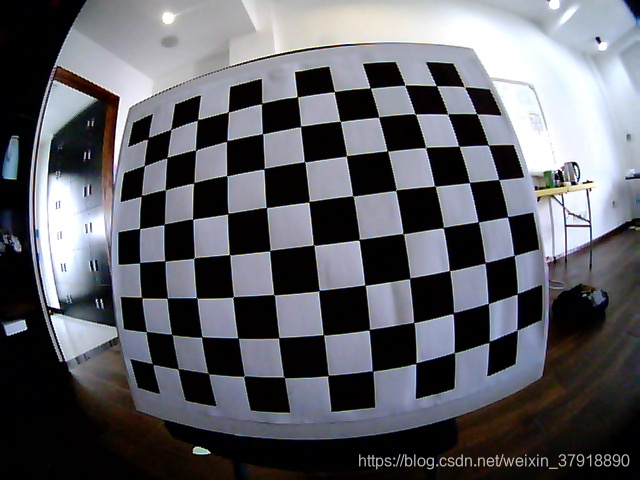
标定以前的图像其中一副图像(单纯展示一下我的相机畸变是啥样的):
在这里插入图片描述
双目图像修正结果示例:
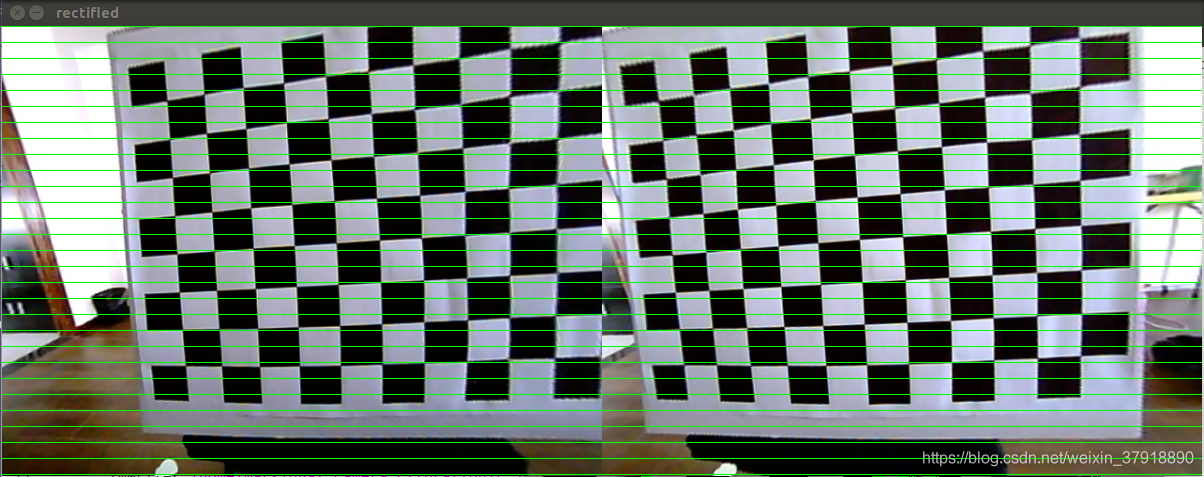
在这里插入图片描述生成的外参extrinsics.yml、内参intrinsics.yml文件:
在这里插入图片描述

二,orb_slam2 双目配置参数详解
参考orbslam2给的EuRoC数据集测试配置文件EuRoC.yaml进行修改。
首先,对EuRoC.yaml对标上述代码生成的extrinsics.yml、intrinsics.yml进行一项项详解,:
%YAML:1.0
#——————————————————————————————–
# Camera Parameters. Adjust them!
#——————————————————————————————–
# Camera calibration and distortion parameters (OpenCV)
Camera.fx: 435.2046959714599
Camera.fy: 435.2046959714599
Camera.cx: 367.4517211914062
Camera.cy: 252.2008514404297
//
这个是 双目相机的参数不是单个的做相机的相机中心跟焦距。
其对应:extrinsics.yml中的 Pr:
例如我的是
Pr: !!
opencv-matrix
rows: 3
cols: 4
dt: d
data: [ 2.8559499458758660e+02, 0., 2.7029193305969238e+02,
-3.9636548646706200e+04, 0., 2.8559499458758660e+02,
2.8112063348293304e+02, 0., 0., 0., 1., 0. ]
对应的修改焦距和相机中心如下:
Camera.fx: 2.8559499458758660e+02
Camera.fy: 2.8559499458758660e+02
Camera.cx: 2.7029193305969238e+02
Camera.cy: 2.8112063348293304e+02
//
Camera.k1: 0.0
Camera.k2: 0.0
Camera.p1: 0.0
Camera.p2: 0.0
//
默认不改,因代码中已做畸变纠正。故均为0.
//
Camera.width: 752
Camera.height: 480
//
相机的图像大小:
我的修改为:
Camera.width: 640
Camera.height: 480
//
# Camera frames per second
Camera.fps: 20.0
# stereo baseline times fx
Camera.bf: 47.90639384423901
//
这个参数是个大坑,其为相机的基线×相机的焦距。
orbslam的参数文件中单位是m
而opencv标定文件中的单位是mm
其数值同样可以在Pr: 中找出 定位在下面矩阵中的-3.9636548646706200e+04 这个数
Pr: !!opencv-matrix
rows: 3
cols: 4
dt: d
data: [ 2.8559499458758660e+02, 0., 2.7029193305969238e+02,
-3.9636548646706200e+04, 0., 2.8559499458758660e+02,
2.8112063348293304e+02, 0., 0., 0., 1., 0. ]
-3.9636548646706200e+
04
就是要填入上面的参数,毫米转为米,求绝对值,填入Camera.bf: 3.9636548646706200e+
01
//
# Color order of the images (0: BGR, 1: RGB. It is ignored if images are grayscale)
Camera.RGB: 1
# Close/Far threshold. Baseline times.
ThDepth: 35
//
深度阈值,不是一个精确的数值,大概预估的,可以不改动,要改的话参考下述公式
自己粗略估计一个相机可以良好显示的最大距离值为s = 10 如果fx = 100 Camera.bf = 20
那么 ThDepth = s*fx/Camera.bf = 10 *100 /20 = 50
将你自己的参数带入上述公式 可以得到大概的阈值。
//
#——————————————————————————————–
# Stereo Rectification. Only if you need to pre-rectify the images.
# Camera.fx, .fy, etc must be the same as in LEFT.P
#——————————————————————————————–
LEFT.height: 480
LEFT.width: 752
//
调整为你自己的相机大小
//
LEFT.D: !!opencv-matrix
rows: 1
cols: 5
dt: d
data:[-0.28340811, 0.07395907, 0.00019359, 1.76187114e-05, 0.0]
//
位于intrinsics.yml中的
cameraDistcoeffL: !!opencv-matrix
rows: 5
cols: 1
dt: d
data: [ -2.8632659642339481e-01, 6.6994801733091039e-02,
-5.4763802000265397e-04, -1.4767993829858197e-03,
-6.1039950504068767e-03 ]
填入上面的 LEFT.D: 即可 左图像畸变参数
//
LEFT.K: !!opencv-matrix
rows: 3
cols: 3
dt: d
data: [458.654, 0.0, 367.215, 0.0, 457.296, 248.375, 0.0, 0.0, 1.0]
//
左图像相机内参,可在intrinsics.yml 的cameraMatrixL:找到:
cameraMatrixL: !!opencv-matrix
rows: 3
cols: 3
dt: d
data: [ 2.8424872262658977e+02, 0., 3.3099977082276723e+02, 0.,
2.8535010886794362e+02, 2.5230877864759117e+02, 0., 0., 1. ]
填入LEFT.K:
//
LEFT.R: !!opencv-matrix
rows: 3
cols: 3
dt: d
data: [0.999966347530033, -0.001422739138722922, 0.008079580483432283, 0.001365741834644127, 0.9999741760894847, 0.007055629199258132, -0.008089410156878961, -0.007044357138835809, 0.9999424675829176]
//
左相机旋转矩阵:extrinsics.yml 中的 Rl:
Rl: !!opencv-matrix
rows: 3
cols: 3
dt: d
data: [ 9.9750705548699170e-01, 3.5207065558213610e-02,
6.1156657760632900e-02, -3.5691910468923047e-02,
9.9933934145707581e-01, 6.8533308118298173e-03,
-6.0874968425042433e-02, -9.0190437917577089e-03,
9.9810465136093429e-01 ]
填入上面的LEFT.R:
//
LEFT.P: !!opencv-matrix
rows: 3
cols: 4
dt: d
data: [435.2046959714599, 0, 367.4517211914062, 0, 0, 435.2046959714599, 252.2008514404297, 0, 0, 0, 1, 0]
//
投影矩阵:
extrinsics.yml 中的 Pl:
Pl: !!opencv-matrix
rows: 3
cols: 4
dt: d
data: [ 2.8559499458758660e+02, 0., 2.7029193305969238e+02, 0., 0.,
2.8559499458758660e+02, 2.8112063348293304e+02, 0., 0., 0., 1.,
0. ]
填入上面的 LEFT.P:
下面的右侧相机参数配置同上述左侧相机参数配置 orb特征点的参数此处不做叙述。
//
RIGHT.height: 480
RIGHT.width: 752
RIGHT.D: !!opencv-matrix
rows: 1
cols: 5
dt: d
data:[-0.28368365, 0.07451284, -0.00010473, -3.555907e-05, 0.0]
RIGHT.K: !!opencv-matrix
rows: 3
cols: 3
dt: d
data: [457.587, 0.0, 379.999, 0.0, 456.134, 255.238, 0.0, 0.0, 1]
RIGHT.R: !!opencv-matrix
rows: 3
cols: 3
dt: d
data: [0.9999633526194376, -0.003625811871560086, 0.007755443660172947, 0.003680398547259526, 0.9999684752771629, -0.007035845251224894, -0.007729688520722713, 0.007064130529506649, 0.999945173484644]
RIGHT.P: !!opencv-matrix
rows: 3
cols: 4
dt: d
data: [435.2046959714599, 0, 367.4517211914062, -47.90639384423901, 0, 435.2046959714599, 252.2008514404297, 0, 0, 0, 1, 0]
//
RIGHT相机的设置与LEFT一致,唯一不同的就是RIGHT.P: 参数,
extrinsics.yml 中的 Pr:如下:
Pr: !!opencv-matrix
rows: 3
cols: 4
dt: d
data: [ 2.8559499458758660e+02, 0., 2.7029193305969238e+02,
-3.9636548646706200e+04
, 0., 2.8559499458758660e+02,
2.8112063348293304e+02, 0., 0., 0., 1., 0. ]
对其进行修改,也就是data中的第4个值,需要转化单位从mm转为m。
所以应该填入RIGHT.P: 的数值为:
data: [ 2.8559499458758660e+02, 0., 2.7029193305969238e+02,
-3.9636548646706200e+01, 0., 2.8559499458758660e+02,
2.8112063348293304e+02, 0., 0., 0., 1., 0. ]
ORB Parameter 没什么争议,较为明了,暂不介绍。
//
#——————————————————————————————–
# ORB Parameters
#——————————————————————————————–
# ORB Extractor: Number of features per image
ORBextractor.nFeatures: 1200
# ORB Extractor: Scale factor between levels in the scale pyramid
ORBextractor.scaleFactor: 1.2
# ORB Extractor: Number of levels in the scale pyramid
ORBextractor.nLevels: 8
# ORB Extractor: Fast threshold
# Image is divided in a grid. At each cell FAST are extracted imposing a minimum response.
# Firstly we impose iniThFAST. If no corners are detected we impose a lower value minThFAST
# You can lower these values if your images have low contrast
ORBextractor.iniThFAST: 20
ORBextractor.minThFAST: 7
#——————————————————————————————–
# Viewer Parameters
#——————————————————————————————–
Viewer.KeyFrameSize: 0.05
Viewer.KeyFrameLineWidth: 1
Viewer.GraphLineWidth: 0.9
Viewer.PointSize:2
Viewer.CameraSize: 0.08
Viewer.CameraLineWidth: 3
Viewer.ViewpointX: 0
Viewer.ViewpointY: -0.7
Viewer.ViewpointZ: -1.8
Viewer.ViewpointF: 500