1、VSCode
2、配置PowerShell执行策略
以管理员身份运行PowerShell,运行
Set-ExecutionPolicy RemoteSigned
,并输入Y,回车确认
3、配置Python环境
-
只安装Python:
华为镜像
、
阿里镜像
、
newbe
、
Python官网ftp地址
、
Python官网中文页面
-
Python嵌入版:
Python3.11.3下载页面
、
Python3.11.3嵌入版下载直链
、各个镜像的嵌入式压缩包 -
虚拟环境或版本管理:
venv
、
virtualenv
、
virtualenvwrapper
、
poetry
、
conda
、
Anaconda
、
Miniconda清华镜像
、
pyenv-win的Github仓库
、
pyenv-virtualenv
、
pipenv
在
streamlit的入门文档
中,支持的 Python 版本为 3.7 – 3.11
本篇文章使用嵌入式Python3.11.3 64位
python-3.11.3-embed-amd64.zip
解压为
python-3.11.3-embed-amd64
文件夹,改名为
python3.11.3-e
4、调整项目结构
新建文件夹
histreamlit
,将
python3.11.3-e
放到
histreamlit
文件夹内
路径:
histreamlit\python3.11.3-e
新建子文件夹
histreamlit
,路径:
histreamlit\histreamlit
添加一个ico格式图片,路径:
histreamlit\2530812_crest_crown_general_item_jwellery_icon.ico

5、继续配置Python环境
.\python3.11.3-e\pip.ini
,新建该文件,内容如下
[global]
index-url = https://mirrors.aliyun.com/pypi/simple
trusted-host = mirrors.aliyun.com
timeout = 120
下载
get-pip.py
,放进
python3.11.3-e
文件夹
运行
.\python3.11.3-e\python.exe .\python3.11.3-e\get-pip.py
编辑
histreamlit\python3.11.3-e\python311._pth
文件,将
#import site
改为
import site
安装black
.\python3.11.3-e\python.exe -m pip install -U black --user
6、安装streamlit
.\python3.11.3-e\python.exe -m pip install streamlit
7、运行streamlit自带hello项目
.\python3.11.3-e\Scripts\streamlit.exe hello
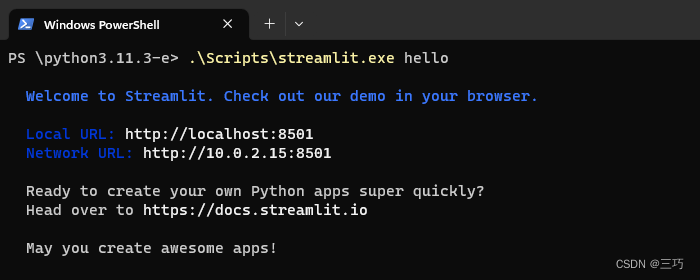
自动启动浏览器显示界面
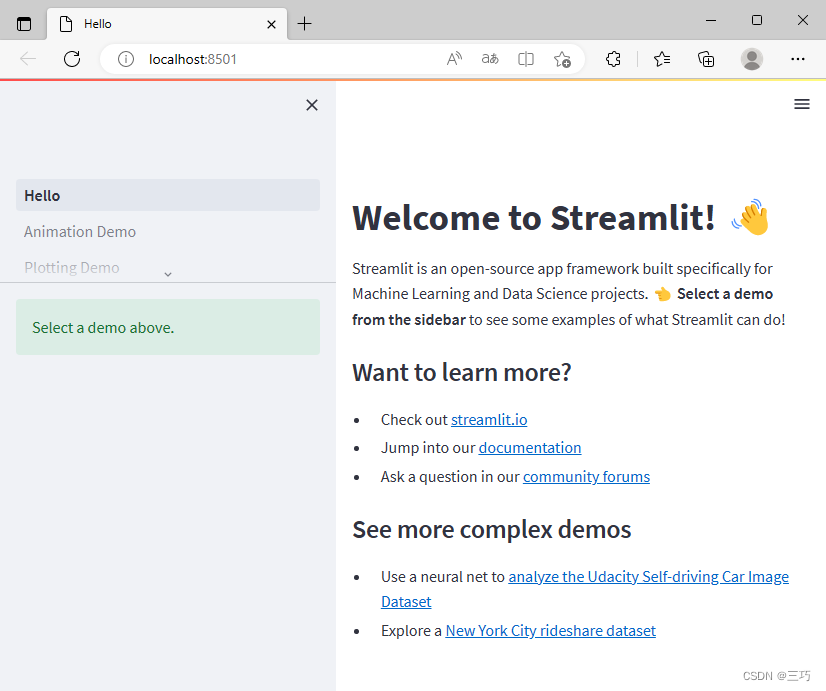
Ctrl+C
停止运行(反应极慢,不如直接关了命令行窗口另开一个)
8、复制一下官方demo
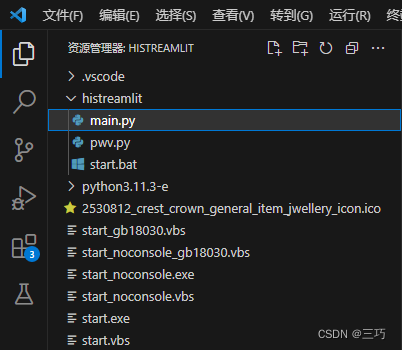
新建文件
histreamlit\histreamlit\main.py

使用 VSCode 打开
histreamlit
文件夹,右下角选择解释器,点击
Enter interpreter path…
,点击
Find…
,选择
.\python3.11.3-e\python.exe
,点击
Select Interpreter
编辑文件
histreamlit\histreamlit\main.py
(复制一下官方的demo)
import streamlit as st
import numpy as np
import time

progress_bar = st.sidebar.progress(0)
status_text = st.sidebar.empty()
last_rows = np.random.randn(1, 1)
chart = st.line_chart(last_rows)

for i in range(1, 101):
    new_rows = last_rows[-1, :] + np.random.randn(5, 1).cumsum(axis=0)
    status_text.text("%i%% Complete" % i)
    chart.add_rows(new_rows)
    progress_bar.progress(i)
    last_rows = new_rows
    time.sleep(0.05)

progress_bar.empty()

# Streamlit widgets automatically run the script from top to bottom. Since
# this button is not connected to any other logic, it just causes a plain
# rerun.
st.button("Re-run")
9、运行
运行
.\python3.11.3-e\Scripts\streamlit.exe run .\histreamlit\main.py
10、静默运行,不启动浏览器
运行
.\python3.11.3-e\Scripts\streamlit.exe run .\histreamlit\main.py --server.headless=true --browser.serverAddress="localhost"
11、安装PyWebview
.\python3.11.3-e\Scripts\pip.exe install pywebview
12、新建文件pwv.py
histreamlit\histreamlit\pwv.py
import webview
import streamlit.web.bootstrap as bootstrap
import multiprocessing as mp
from multiprocessing import Process
import socket
from http.server import HTTPServer
import os
import signal


def check_port_in_use(port):
    try:
        # 创建一个HTTPServer实例
        httpd = HTTPServer(("", port), None)
        # 关闭HTTPServer实例
        httpd.server_close()
        # 如果没有抛出异常,说明端口可以使用
        return False
    except socket.error:
        # 如果抛出异常,说明端口已经被占用
        return True


def guess_streamlit_port():
    for p in range(8501, 8601):
        if not check_port_in_use(p):
            # print(f"端口 {p} 可以使用")
            return p
        else:
            # print(f"端口 {p} 已被使用")
            pass


def stre(q: mp.Queue):
    q.put(os.getpid())

    # .\python3.11.3-e\Scripts\streamlit.exe run .\histreamlit\main.py --server.headless=true --browser.serverAddress="localhost"
    flag_options = {
        "server.headless": True,
        "global.developmentMode": False,
        "browser.serverAddress": "localhost",
    }
    bootstrap.load_config_options(flag_options=flag_options)
    flag_options["_is_running_with_streamlit"] = True
    bootstrap.run(
        "main.py", "../python3.11.3-e/Scripts/streamlit.exe run", [], flag_options
    )


def webv(q: mp.Queue, port):
    q.put(os.getpid())

    def on_closing():
        print("Closing window...")

        pids = [q.get(), q.get()]
        # 分辨出哪个是streamlit,将streamlit放到第0位
        if pids[0] == os.getpid():
            pids.reverse()
        pids.append(os.getppid())

        for p in pids:
            os.kill(p, signal.SIGTERM)
        # return True 表示webview将关闭。不过无所谓,满门抄斩了已经
        return True

    win = webview.create_window(
        "histreamlit", f"http://localhost:{port}/", confirm_close=True
    )
    win.events.closing += on_closing
    webview.start()


if __name__ == "__main__":
    port = guess_streamlit_port()

    q = mp.Queue()
    processes: list[Process] = []

    webv_process = mp.Process(name="webv_process", target=webv, args=((q, port)))
    webv_process.start()
    processes.append(webv_process)

    stre_process = mp.Process(name="stre_process", target=stre, args=((q,)))
    stre_process.start()
    processes.append(stre_process)

    for p in processes:
        p.join()
    pass
13、运行streamlit+pywebview
.\python3.11.3-e\python.exe .\histreamlit\pwv.py
14、运行streamlit+pywebview(bat脚本)
新建文件
histreamlit\histreamlit\start.bat
@echo off
cd /d %~dp0
..\python3.11.3-e\python.exe .\pwv.py
双击
start.bat
运行
15、编写vbs,启动不显示控制台
histreamlit\start.vbs
set WshShell = createobject("WScript.Shell")           ' 创建一个对象引用
dim currentDir                                         ' 创建变量
currentDir = WshShell.CurrentDirectory                 ' 获取当前文件夹
WshShell.run currentDir & "/histreamlit/start.bat", 1  ' 运行bat, 0表示不显示窗口, 1表示显示窗口
histreamlit\start_noconsole.vbs
set WshShell = createobject("WScript.Shell")           ' 创建一个对象引用
dim currentDir                                         ' 创建变量
currentDir = WshShell.CurrentDirectory                 ' 获取当前文件夹
WshShell.run currentDir & "/histreamlit/start.bat", 0  ' 运行bat, 0表示不显示窗口, 1表示显示窗口
唯一的区别一个参数用的是1,另一个用的是0
分别双击vbs脚本运行
16、将vbs转换为exe
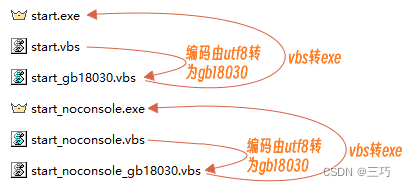
注:之前截图中带有gb18030字样的vbs只是文本编码是gb18030,因为用来vbs转exe的软件不认识utf8,注释中文字会乱码而已
以
start_gb18030.vbs
转
start.exe
为例
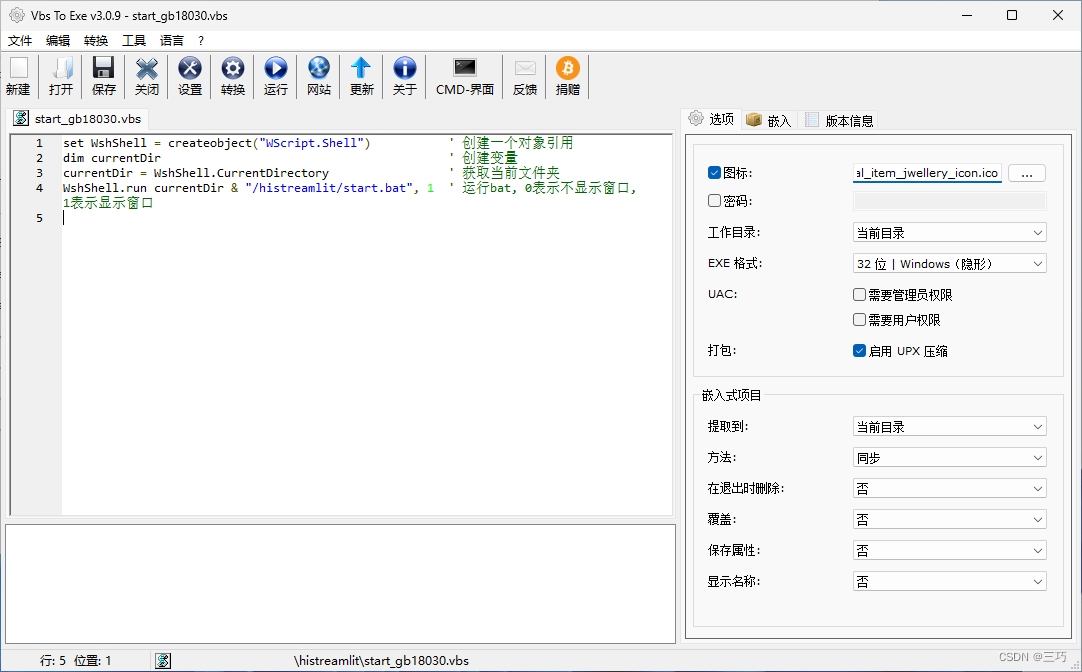
勾选
图标
,选择ico文件
EXE格式
,改为32位 | Windows(隐形),(这里的隐形是vbs的隐形,不是bat,python的窗口隐形)
勾选
启用 UPX 压缩
点击工具栏的
转换
(圆底齿轮图标),文件名起名为
start.exe
保存,软件将生成exe文件
17、最终效果
运行
start.exe
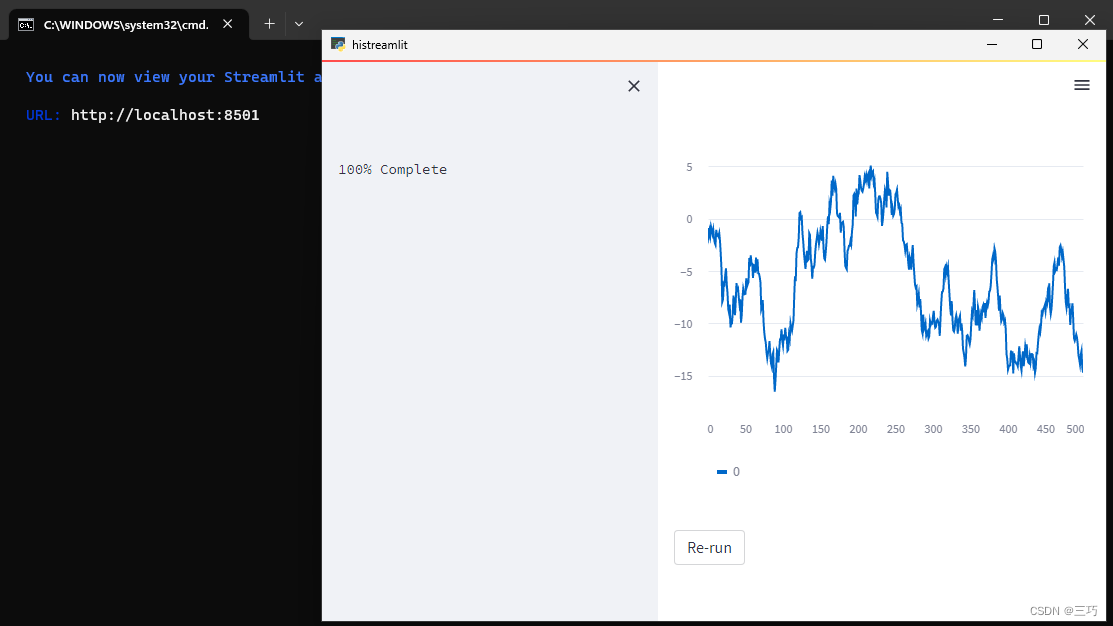
关闭pywebview的窗口cmd会显示一下
Closing window...
,然后就消失了

运行
start_noconsole.exe
是一样的,就是没有控制台窗口而已,更像一个桌面应用了
18、怎么分发
有什么可分发的,文件夹发给别人运行exe不就得了,还想咋分发,就这玩意还想加密啊,用服务器呗,肯定密
7、(失败)参考议题,制作桌面端应用
(失败原因:
npm run dump histreamlit numpy
一直运行个没完,输出停滞)
Streamlit – #1370议题
@stlite/desktop – README.md
8、(失败)安装nvm
访问下载地址下载安装nvm:
百度云分享
官网直装链接
nvm的github发行界面
下载nvm-setup.exe
GitCode镜像
下载nvm-setup.exe(登录获取下载链接,下载链接还是Github的,唯一的作用就是挑选版本的时候快点)
9、(失败)配置nvm
nvm install lts
安装最新版本的Node.js,本文安装的是
18.16.0
nvm use lts
启用这个版本
运行
cmd /c "nvm -v && node -v && npm -v"
,正常输出版本号说明安装完成
10、(失败)配置npm镜像
npm config set registry https://registry.npmmirror.com
11、(失败)准备使用stlite
histreamlit-e
和
histreamlit
两个文件夹应当同级,它们是独立的
md histreamlit-e
cd .\histreamlit-e\
npm init -y
code .
将编辑文件
.\histreamlit-e\package.json
,改为以下内容
{
  "name": "histreamlit-e",
  "version": "0.1.0",
  "main": "./build/electron/main.js",
  "scripts": {
    "dump": "dump-stlite-desktop-artifacts",
    "serve": "cross-env NODE_ENV=production electron .",
    "pack": "electron-builder --dir",
    "dist": "electron-builder",
    "postinstall": "electron-builder install-app-deps"
  },
  "build": {
    "files": ["build/**/*"],
    "directories": {
      "buildResources": "assets"
    }
  },
  "devDependencies": {
    "@stlite/desktop": "^0.25.0",
    "cross-env": "^7.0.3",
    "electron": "23.1.1",
    "electron-builder": "^23.6.0"
  }
}
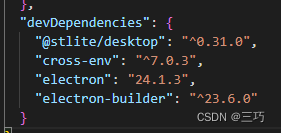
访问以下npm包,查看版本并修改
package.json

@stlite/desktop – npm
cross-env – npm
electron – npm
electron-builder – npm
例如以下截图:
12、(失败)安装依赖
在
histreamlit-e
目录中
运行
cmd /c "set ELECTRON_MIRROR=https://npmmirror.com/mirrors/electron/&& npm install"
提示高危:
6 high severity vulnerabilities
运行
cmd /c "npm audit fix --force --registry=https://registry.npmjs.org"
解决高危
13、(失败)将histreamlit的内容写进histreamlit-e
新建文件
.\histreamlit-e\histreamlit\streamlit_app.py
,内容与
.\histreamlit\histreamlit\main.py
一致
14、(失败)运行
在
histreamlit-e
目录中
npm run dump histreamlit numpy
一直运行不完成,没有CPU或者磁盘占用,也许在下载什么东西但是没有timeout功能导致的
