一. 继承Thread类
继承Thread类创建线程的步骤:
- 创建一个自定义类继承Thread类,重写run()方法,将所要单独线程运行写入run()方法中;
- 创建Thread类的子类的对象;
- 调用该对象的start()方法,该start()方法表示开启线程,然后调用执行run方法;
 	@Test
    public void test() {
        Thread.currentThread().setName("主进程");
        System.out.println("当前线程为:" + Thread.currentThread().getName());
        //创建一个新线程
        ThreadDemo thread1 = new ThreadDemo();
        //为线程设置名称
        thread1.setName("次线程");
        //开启线程
        thread1.start();
    }
    class ThreadDemo extends Thread {
	    @Override
	    public void run() {
	        System.out.println("当前线程为:" + Thread.currentThread().getName());
	    }
	}
二. 继承Runnable接口
实现Runnable接口创建线程的步骤为:
- 创建一个类并实现Runnable接口(可以使用Lambda表达式)
- 重写run()方法,将所要单独线程的代码写入run()方法中
- 创建该类对象,将该对象作为Thread类的构造器参数传入
- 使用构造器创建对象调用start()方法(运行该线程)
@Test
    public void test() {
        Thread.currentThread().setName("主进程");
        System.out.println("当前线程为:" + Thread.currentThread().getName());
        //创建线程
        Thread thread = new Thread(() -> {
            System.out.println("当前线程为:" + Thread.currentThread().getName());
        });
        thread.setName("次线程");
        thread.start();
        Thread thread1 = new Thread(new ThreadDemo());
        thread1.setName("次次线程");
        thread1.start();

    }

    class ThreadDemo implements Runnable {
        @Override
        public void run() {
            System.out.println("当前线程为:" + Thread.currentThread().getName());
        }
    }
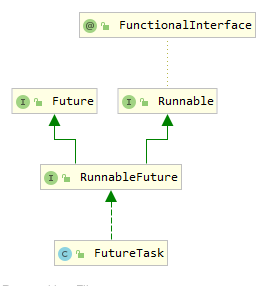
三. 实现Callable接口与创建Future接口实现类对象
实现Callable接口并实现Callable接口
- 创建一个类并实现Callable接口(可以使用Lambda表达式)
- 重写call()方法,将所要单独线程执行的代码写进call方法中,需要注意的是call()方法是有返回值的,并且可以抛出异常
-
如果想要获取运行该线程后的返回值,需要创建Futrue接口的实现类的对象,也就是FutureTask的对象,通过调用该对象的get()方法得到call()方法的返回值
- 使用FutureTask的带参构造器创建对象,并传入实现了Callable接口的类的对象(可以使用Lambda表达式)
- 使用Thread类的带参构造器创建对象,将FutureTask类的对象作为参数传入,然后调用Thread类的对象的start()方法运行该线程
	@Test
    public void test5() throws ExecutionException, InterruptedException {
        Thread.currentThread().setName("主进程");
        System.out.println("当前线程为:" + Thread.currentThread().getName());
        //创建FutureTask
        FutureTask<String> futureTask = new FutureTask<>(() -> {
            System.out.println("当前线程为:" + Thread.currentThread().getName());
            return "二级线程";
        });
        //创建线程
        Thread thread = new Thread(futureTask, "次线程");
        thread.start();
        System.out.println("当前返回值为:" + futureTask.get());
        //不使用Lambda表达式
        FutureTask<String> stringFutureTask = new FutureTask<String>(new ThreadDemo());
        new Thread(stringFutureTask, "次线程二").start();
        System.out.println("当前返回值为:" +stringFutureTask.get());

    }

    class ThreadDemo implements Callable {

        @Override
        public Object call() throws Exception {
            System.out.println("当前线程为:" + Thread.currentThread().getName());
            return "二级线程";
        }
    }
四. 使用线程池创建
使用线程池创建线程的步骤
- 使用Executors类中的newFixedThreadPool(int num)方法创建一个线程数量为num的线程池
-
使用线程池中的execute()方法执行由实现Runnable接口创建的线程
,
使用submit()方法执行由实现Callable接口创建的线程
-
调用线程池中的shutdown()方法关闭线程池(只是关闭了获取线程,
线程池并未立即死亡
,会在执行完被调用的线程后死亡)
 	//实现Runnable接口
    class ThreadDemo6 implements Runnable {
        @Override
        public void run() {
            try {
                Thread.sleep(1000);
            } catch (InterruptedException e) {
                e.printStackTrace();
            }
            System.out.println("ThreadDemo6当前线程为:" + Thread.currentThread().getName());
        }
    }

    //实现Runnable接口
    class ThreadDemo7 implements Runnable {
        @Override
        public void run() {
            try {
                Thread.sleep(1000);
            } catch (InterruptedException e) {
                e.printStackTrace();
            }
            System.out.println("ThreadDemo7当前线程为:" + Thread.currentThread().getName());
        }
    }

    class ThreadDemo8 implements Callable<String> {
        @Override
        public String call() {
            try {
                Thread.sleep(1000);
            } catch (InterruptedException e) {
                e.printStackTrace();
            }
            System.out.println("ThreadDemo8当前线程为:" + Thread.currentThread().getName());
            return "ThreadDemo8返回的结果:" + Thread.currentThread().getName();
        }
    }
    @Test
    public void test6() throws ExecutionException, InterruptedException {
        Thread.currentThread().setName("主线程");
        System.out.println("当前线程为:" + Thread.currentThread().getName());
        //通过线程池工厂创建线程数量为2的线程池
        ExecutorService executorService = Executors.newFixedThreadPool(2);
        executorService.execute(new ThreadDemo6());
        executorService.execute(new ThreadDemo7());
        //submit()用于实现Callable接口创建的线程
        Future<String> task = executorService.submit(new ThreadDemo8());
        //获取call方法的返回值
        String result = task.get();
        System.out.println(result);
        //关闭线程池
        executorService.shutdown();
    }
版权声明:本文为at10090原创文章,遵循 CC 4.0 BY-SA 版权协议,转载请附上原文出处链接和本声明。