1.C#写com组件
开发环境 vs2005
1.新建工程:ClassLibrary1
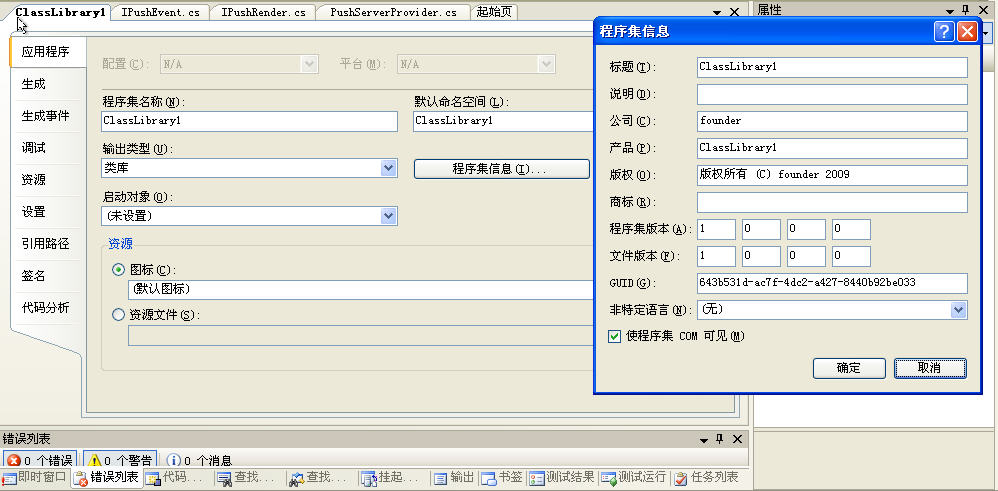
2.右键点击工程->应用程序->程序集信息->使程序集com可见,打上勾

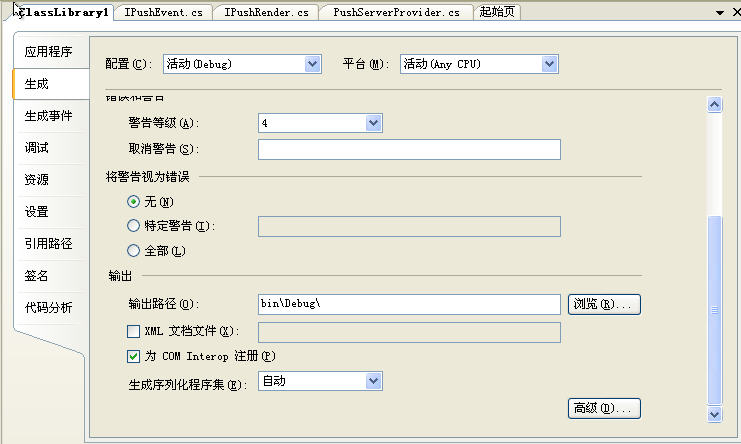
右键点击工程->生成->为com Interop注册 打上勾

3.GuidAttribute中的Guid
通过点击工具->创建GUID->选择4->New Guid->copy->粘贴到此外就行
4.IPushEvent.cs


CodeusingSystem;usingSystem.Collections.Generic;usingSystem.Text;usingSystem.Runtime.InteropServices;namespaceClassLibrary1
{
[GuidAttribute(“D9490AF8-2372-4191-8E63-D0DBC9E6C81D”), InterfaceType(ComInterfaceType.InterfaceIsIDispatch)]publicinterfaceIPushEvent
{voidSyncRequestEvent(stringmsg);
}
}
5.IPushRender.cs


CodeusingSystem;usingSystem.Collections.Generic;usingSystem.Text;usingSystem.Runtime.InteropServices;namespaceClassLibrary1
{
[GuidAttribute(“71F09A88-2308-4fcd-9957-0488DD1584FC”),InterfaceType(ComInterfaceType.InterfaceIsIDispatch)]publicinterfaceIPushRender
{stringResponseRenderAsyc(stringcontent,objectuserstate);
}
}
6.


CodeusingSystem;usingSystem.Collections.Generic;usingSystem.Text;usingSystem.Runtime.InteropServices;namespaceClassLibrary1
{
[GuidAttribute(“0E99CFC3-741C-406e-9E78-FB82E56C3F1C”),ClassInterface(ClassInterfaceType.AutoDispatch)]
[ProgId(“ClassLibrary1.PushServerProvider”)]
[ComSourceInterfaces(typeof(IPushEvent))]publicclassPushServerProvider : IPushRender
{publicdelegatevoidRequestDelegate(stringmsg);publiceventRequestDelegate SyncRequestEvent;publicstringResponseRenderAsyc(stringcontent,objectuserstate)
{stringretMessage=”这是从服务器端返回的:”+content;
OnRequestEvent(retMessage);returnretMessage;
}publicvoidOnRequestEvent(stringmsg)
{if(SyncRequestEvent!=null)
{try{
SyncRequestEvent(msg);
}catch(Exception ex)
{
System.Windows.Forms.MessageBox.Show(ex.Message);
}
}
}
}
}
6.编译以后,就要以在开发环境中注册了新生成的com组件,在客户环境中,通过regasm.exe注册com组件
regasm.exe的默认安装路径为:C:\Windows\Microsoft.NET\Framework\v2.0.50727\RegAsm.exe
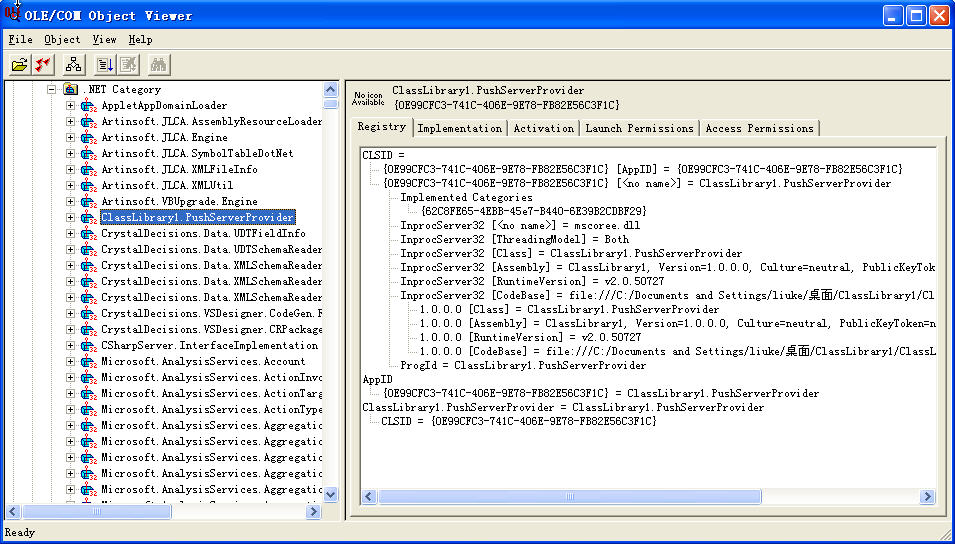
7.可以通过ole/com object viewer可以查看com组件

8.java sdk1.4 通过jacob调用com组件http://danadler.com/jacob/
java测试程序


Codeimportcom.jacob.activeX.*;importcom.jacob.com.Dispatch;importcom.jacob.com.Variant;importcom.jacob.com.*;publicclassTest {/***@paramargs*/publicstaticvoidmain(String[] args) {//TODO Auto-generated method stubActiveXComponent mf=newActiveXComponent(“ClassLibrary1.PushServerProvider”);
Object o=mf.getObject();
SensorEvents event=newSensorEvents();//hook it up to the sControl sourceDispatchEvents de=newDispatchEvents((Dispatch)o, event);
System.out.println(Dispatch.call(mf,”ResponseRenderAsyc”,newVariant(“123”),null));
mf.safeRelease();
}
}
9.java 事件注册类
import com.jacob.com.Variant;publicclassSensorEvents {publicvoidSyncRequestEvent(Variant[] msg)
{
System.out.println(“java callback for SyncRequestEvent!”);
}
}
在部署时需要将ClassLibrary1.dll和jacob-1.14.3-x86.dll
使用RegAsm.exe 路径\ClassLibrary1.dll /codebase注册dll
Run->Arguments->VM arguments-> -Djava.library.path=jacob-1.14.3-x86.dll 所在的文件夹路径