前言
css、js(vue)进行textarea自适应高度(超详细说明)
一文中我有使用弹性布局来设置样式,通过
监听文本域的input 事件修改当前文本域的高度
来达到
文本域自适应高度的问题
。
关键代码如下:

其实上面的已经可以解决大部分关于文本域自适应高度的问题了,但当我需求是默认显示一行,最高显示4行的时候,出现了一个新问题。
在字体大小为16px,行高为30px
的情况下,当你
设置this.style.height = 'inherit'
的时候,行高默认展示的 scrollHeight 会加上padding的值,这时候我的 padding 为上下16px,这就间接导致初始化文本域高度的时候,
所展示的默认高为 32 (行高) + 32 (上下的padding) = 64, 当我不改变设置this.style.height = 'inherit'的时候
,而文本域由于有placeholder导致无法最小显示两行,这属于一个无法修改的bug。

关于w3c上scrollHeight 的定义:
scrollHeight 属性是一个只读属性,它返回该元素的像素高度,高度包含内边距(padding),不包含外边距(margin)、边框(border),是一个整数,单位是像素 px。
一、通过隐藏div的方式来设置文本域自适应高度
原理:复制一份展示文本域的内容,然后将这个div设置z-index为100(数值任意,但是不能在页面上看到这个div,
直接设置display: none会导致获取不到隐藏div的高度
)。将这个隐藏div的scrollHeight赋值给文本域即可。
1. 新增一个文本域样式一个的dom,但是里面的textarea改为div
<div class="textarea_box">
  <textarea v-model="text" key="teatareaId" id="teatareaId" class="textarea" placeholder="请输入内容"></textarea>
  <div class="btn"></div>
</div>
<div class="textarea_box">
  <div key="teatareaDivId" id="teatareaDivId" class="textarea_div">{{text}}</div>
  <div class="btn"></div>
</div>
2. 隐藏div的class
直接设置display: none会导致获取不到隐藏div的高度,所以这里使用了z-index: 100,用层级将其遮挡。
.side {
 display: flex;
  flex-direction: column;
  height: 100%;
  .textarea_box {
    display: flex;
    width: 100%;
    border-radius: 4px;
    border: 1px solid #e5e9eb;
    background: #fff;
    box-sizing: border-box;
    .textarea{
      flex: 1;
      height: 32px;
      line-height: 30px;
      font-size: 16px;
      margin: 16px;
      max-height: 122px;
      overflow-x: hidden;
      overflow-y: auto;
      box-sizing: border-box;
    }
    .textarea_div{
      position: absolute;
      z-index: -100;
      width: calc(100% - 128px);
      min-height: 32px;
      line-height: 30px;
      font-size: 16px;
      margin: 16px;
      box-sizing: border-box;
      white-space: pre-wrap;
    }
    .btn{
      position: relative;
      width: 48px;
      height: 100%;
      border-radius: 0 3px 3px 0;
      background: #1879fe;
      &_disabled{
        opacity: 0.3;
      }
    }
  }
}
3.设置文本域高度的方法
// 设置文本域高度的方法
setTextareaHeight() {
  this.$nextTick(function () {
    let teatareaDom = document.getElementById('teatareaId'); // 文本域的dom
    let teatareaDivDom = document.getElementById('teatareaDivId'); // 隐藏input的dom
    function setHiehgt(){
      chapDom.style.height = "auto"; // 初始化高度
      chapDom.style.height = `${teatareaDivDom.scrollHeight}px`; // 文本域的高度等于隐藏input的高度
    }
    setHiehgt(); // 进入页面默认调用一次获取对应的高度
    // 监听修改了文本域的值修改高度
    document.getElementById('chapTextareaId').addEventListener("input", function() {
      setHiehgt();
    });
  });
},
执行以上步骤后,你可以根据max-height来设置最多展示几行。但是这样依旧会有一个问题, 当前按回车的时候,div里面的数据是不会换行的,在我思考N久后,找到了element-ui的input组件可以设置自适应高度
二、仿element-ui组件设置textarea自适应高度
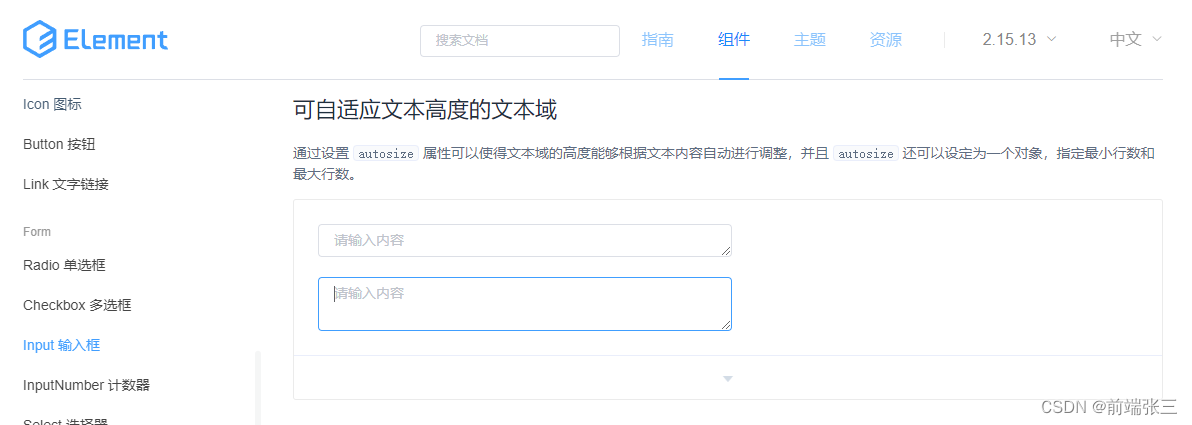
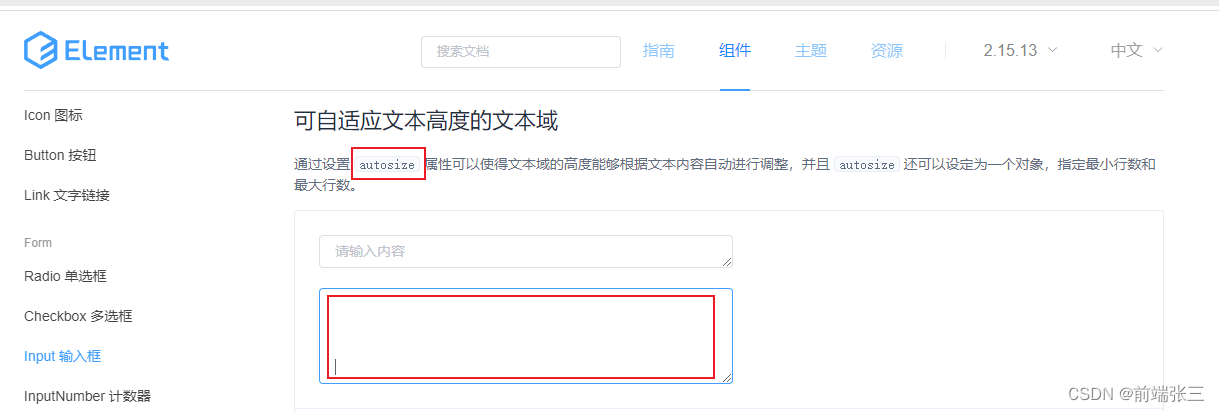
1.element-ui中自适应效果
效果图前:
效果图后(按回车):
2. 看源码,盘逻辑,找思路
(1)找到element-ui的input
element-ui的input地址为:https://github.com/ElemeFE/element/blob/dev/packages/input/src/input.vue
。如下图:

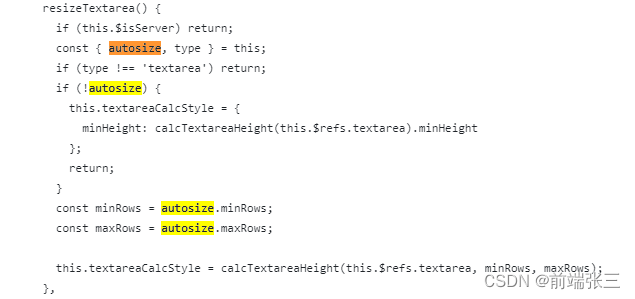
(2)在input.vue中查看autosize 方法(element-ui就是由这个方法控制文本域高度的)
(3)resizeTextarea方法
resizeTextarea方法中,calcTextareaHeight方法是通过外部应用过来的,这个说起来比较麻烦,后面会贴代码,有兴趣的可以研究一下。然后其他的我们都了解怎么用了。最后就是看一下这个方法在哪里调用了,即触发情况。
(3)resizeTextarea触发时机(文件中搜索只有四次)
①毫无疑问:定义也是一次
②mounted中调用
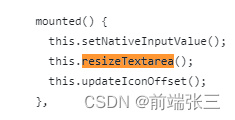
③watch监听文本的值变动后调用
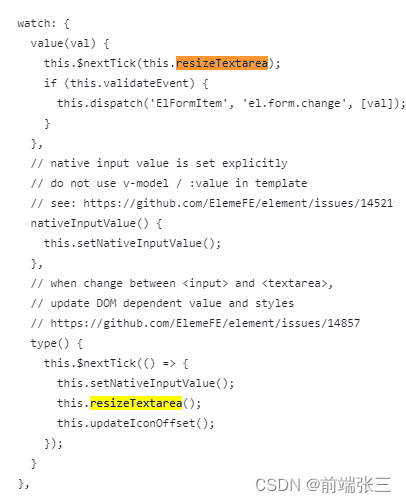
特别注意:里面的this.$nextTick不要遗漏。
3. 项目中实际使用及其代码
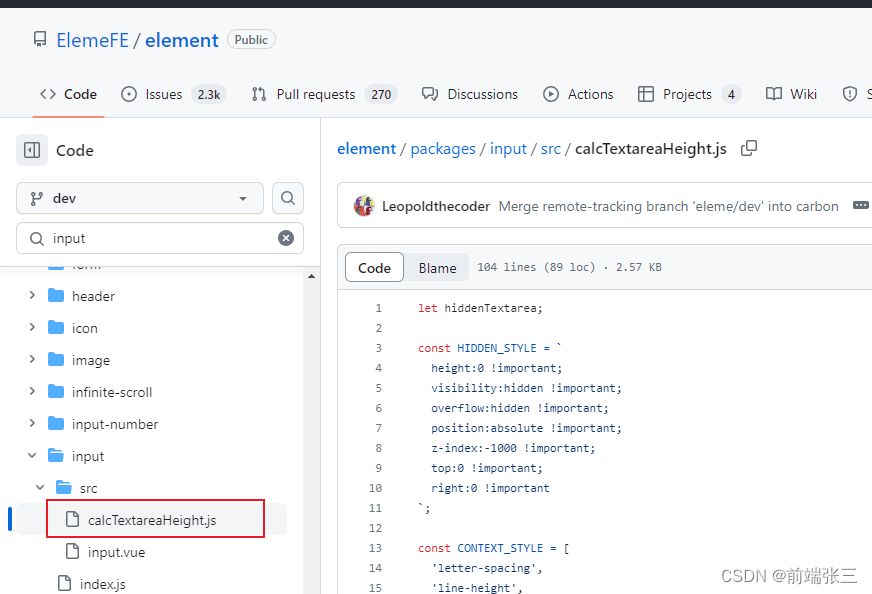
(1) calcTextareaHeight.js
文件路径:
/src/utils/calcTextareaHeight.js
这里的calcTextareaHeight.js文件和element-ui里面的没有丝毫改动
let hiddenTextarea;

const HIDDEN_STYLE = `
  height:0 !important;
  visibility:hidden !important;
  overflow:hidden !important;
  position:absolute !important;
  z-index:-1000 !important;
  top:0 !important;
  right:0 !important
`;

const CONTEXT_STYLE = [
  'letter-spacing',
  'line-height',
  'padding-top',
  'padding-bottom',
  'font-family',
  'font-weight',
  'font-size',
  'text-rendering',
  'text-transform',
  'width',
  'text-indent',
  'padding-left',
  'padding-right',
  'border-width',
  'box-sizing'
];

function calculateNodeStyling(targetElement) {
  const style = window.getComputedStyle(targetElement);

  const boxSizing = style.getPropertyValue('box-sizing');

  const paddingSize = (
    parseFloat(style.getPropertyValue('padding-bottom')) +
    parseFloat(style.getPropertyValue('padding-top'))
  );

  const borderSize = (
    parseFloat(style.getPropertyValue('border-bottom-width')) +
    parseFloat(style.getPropertyValue('border-top-width'))
  );

  const contextStyle = CONTEXT_STYLE
    .map(name => `${name}:${style.getPropertyValue(name)}`)
    .join(';');

  return { contextStyle, paddingSize, borderSize, boxSizing };
}

export default function calcTextareaHeight(
  targetElement,
  minRows = 1,
  maxRows = null
) {
  if (!hiddenTextarea) {
    hiddenTextarea = document.createElement('textarea');
    document.body.appendChild(hiddenTextarea);
  }

  let {
    paddingSize,
    borderSize,
    boxSizing,
    contextStyle
  } = calculateNodeStyling(targetElement);

  hiddenTextarea.setAttribute('style', `${contextStyle};${HIDDEN_STYLE}`);
  hiddenTextarea.value = targetElement.value || targetElement.placeholder || '';

  let height = hiddenTextarea.scrollHeight;
  const result = {};

  if (boxSizing === 'border-box') {
    height = height + borderSize;
  } else if (boxSizing === 'content-box') {
    height = height - paddingSize;
  }

  hiddenTextarea.value = '';
  let singleRowHeight = hiddenTextarea.scrollHeight - paddingSize;

  if (minRows !== null) {
    let minHeight = singleRowHeight * minRows;
    if (boxSizing === 'border-box') {
      minHeight = minHeight + paddingSize + borderSize;
    }
    height = Math.max(minHeight, height);
    result.minHeight = `${ minHeight }px`;
  }
  if (maxRows !== null) {
    let maxHeight = singleRowHeight * maxRows;
    if (boxSizing === 'border-box') {
      maxHeight = maxHeight + paddingSize + borderSize;
    }
    height = Math.min(maxHeight, height);
  }
  result.height = `${ height }px`;
  hiddenTextarea.parentNode && hiddenTextarea.parentNode.removeChild(hiddenTextarea);
  hiddenTextarea = null;
  return result;
};
(2) 文本域组件 new-textarea.vue (名字任意,别取textarea)
文件路径:
/src/components/new-textarea.vue
<template>
  <textarea
  :style="textareaCalcStyle"
  v-model="nValue"
  key="chapTextarea"
  id="textareaId"
  class="textarea"
  placeholder="请输入内容"
  wrap="hard"></textarea>
</template>

<script>
import calcTextareaHeight from '../utils/calcTextareaHeight.js'
export default {
    props: {
        value: {
            type: String,
            default: ''
        },
        maxRows: {
            type: Number,
            default: 4,  // 可以根据实际情况设置,也可以设置max-height来做限制
        }
    },
    data () {
        return {
            nValue: this.value,
            textareaCalcStyle: {}
        }
    },
    watch: {
        value: {
            handler (v) {
                if (this.nValue !== v) {
                    this.nValue = v;
                }
                this.$nextTick(() => {
                    this.resizeTextarea();
                })
            }
        },
        nValue: {
            handler (v) {
                this.$emit('input',v);
            }
        }
    },
    mounted () {
        this.$nextTick(() => {
            this.resizeTextarea();
        })
    },
    methods: {
        resizeTextarea() {
            const maxRow = this.maxRows;
            this.textareaCalcStyle = calcTextareaHeight(this.$el, 1, maxRow);
        },
    }
}
</script>
(3) 要使用文本域高度自适应的页面(例如index.vue)
文件路径:
/src/views/index.vue
引入textarea.vue组件,注册,在页面上使用
// 引入
import newTextarea from '../components/new-textarea'
// 注册
export default {
  components: { newTextarea },
}
// 使用
<newTextarea v-model="textVlaue"></newTextarea>
(4)效果
①内容为空时

②输入回车时

③html中

总结
太难了