一、原理介绍
hwasan是Harsware Address Sanitizer的简称,它是clang llvm提供的一套内存错误检测系统,可以用来检测C/C++代码常见的内存错误
-
Stack and heap buffer overflow/underflow
-
Global buffer overflow/underflow
-
Heap use after free
-
Stack use outside scope
-
Double free/wild free
-
Initialization order bugs
相比与之前的asan(Address Sanitizer)它在性能、内存占用上都有不小的提升,但是由于它使用了依赖AArch64的Address tagging特性,所以只能在64位程序开启,目前只有Android 10.0及以上版本的AArch64默认支持了hwasan。
Address tagging特性允许应用程序自定义数据存储到虚拟地址的最高8位,当CPU在操作这个虚拟地址的时候会自动忽略它,称为Top byte ignore。
它检测内存访问错误的原理如下
-
将整个虚拟内存区间按照16:1的比例划分为user memory和shadow memory,无论是堆上、栈上还是全局对象他们的内存起始地址都按照16字节对齐,保证每16字节的user memory都能映射到1字节的shadow memory。
-
分配对象的时候,随机分配一个8位的随机tag标记到该对象的虚拟地址最高8位,同时将该tag也会保存到其映射的shadow memory中。
-
编译器在每个内存地址的load/store之前都会插入检查指令,用于确认操作的地址最高8位保存的tag与其映射的shadow memory中的tag值一致。
-
对象回收后也会重新分配一个随机值,保存到其映射的shadow memory中,一旦后面出现use after free就会检测到tag值不一致异常。
-
当分配的对象小于16字节时,多余的内存不会再分配给其它对象,此时shadow memory中保存的是对象所占内存的实际字节数,而tag值则保存在16字节的最后一个字节里面。
关于hwasan的详细介绍可以参考
https://arxiv.org/pdf/1802.09517.pdf
https://clang.llvm.org/docs/HardwareAssistedAddressSanitizerDesign.html
二、编译与配置
1. 编译相关
在Android 10上由于aosp已经默认支持了hwasan,整机编译方式很简单,只需要在make的时候同时设置环境变量 SANITIZE_TARGET=hwaddress即可。
        make SANITIZE_TARGET=hwaddress


       如果想对某个单独模块关闭hwasan编译,可以通过更改mk文件


        LOCAL_NOSANITIZE := hwaddress


       或bp文件


        sanitize: { hwaddress: false } 完成。
关于hwasan编译规则相关代码是在 build/soong/cc/sanitizer.go 文件,里面有很多全局的配置,具体作用可以参考后面配置与管理一节。
2. 源码获取
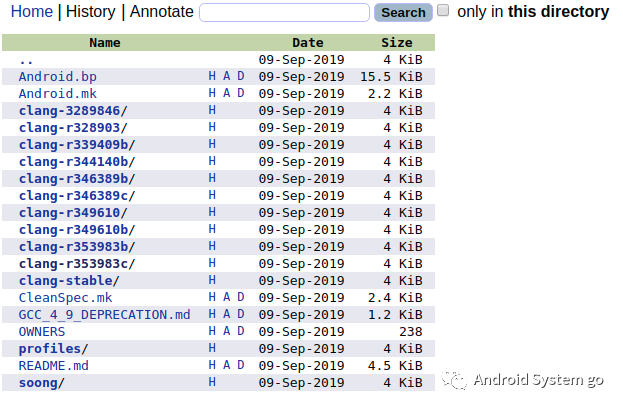
在aosp 源码里面hwasan相关库是通过prebuilt方式预置的,并没有直接提供源码,预置路径位于
prebuilts/clang/host/linux-x86/
目录下。这个目录下有多个clang版本,根据README.md说明去源码的build/soong/cc/config/global.go文件查询当前使用的clang版本。这里我看的Android 10.0版本,所以ClangDefaultVersion = clang-r353983c。进入到 clang-r353983c /lib64 /clang /9.0.3 /lib /linux / 目录可以看到预置了支持不同平台的各类asan、hwasan、ubsan、scudo等库文件。

这里我一开始就犯了个错误,直接去 https://github.com/llvm/llvm-project 下载的hwasan源码,阅读源码中发现与crash现场有诸多差异。后来发现是因为版本不一致导致,接着根据
clang-r353983c/manifest_5484270.xml
文件里面的project信息重新进行sync后才得到了匹配与之的源码。
<project name="toolchain/compiler-rt" path="toolchain/compiler-rt" revision="c21f6011d6c4983e422ac8ffd8fbeb205503a810" />
三、源码分析
hwasan作为clang llvm的一部分其代码颇为复杂、涉及的知识点也很广,尤其像前面所说的对于内存 load/store之前插入检查指令等都需要编译器来实现,而个人对编译器这块并不熟悉加上目前也没有很强的动力去研究它。所以这里我们简单从hwasan相关配置、Shadow Memory管理、内存分配与释放、Backtrace回溯、内存访问检测、错误报告等方面来分析hwasan的原理。
1、配置与管理
在阅读hwasan代码过程中看到各处都用到两个flag()函数来判断相关配置,如 flags()→disable_allocator_tagging 是否禁止分配内存的时候打tag,common_flags()→allocator_may_return_null 判断分配内存是否会返回null。他们的实现分别如下
static Flags hwasan_flags;Flags *flags() {                                                                                                                                                                          return &hwasan_flags;} extern CommonFlags common_flags_dont_use;inline const CommonFlags *common_flags() {
      return &common_flags_dont_use;}
其中Flags对应着 hwasan_flags.inc 配置文件里面的选项,而CommonFlags 则对应着 sanitizer_flags.inc 配置文件里面的选项。这两个文件都是一种配置文件,在hwasan初始化过程中会直接include然后通过特殊的宏替换生成对应的数据结构以及默认值。以下面hwasan_flags.inc为例,包括了大约20个的配置选项以及默认值,并且都提供了很详细的注释说明,这里就不一一细说了。
// HWASAN_FLAG(Type, Name, DefaultValue, Description)// See COMMON_FLAG in sanitizer_flags.inc for more details.HWASAN_FLAG(bool, verbose_threads, false, "inform on thread creation/destruction")HWASAN_FLAG(bool, tag_in_malloc, true, "")HWASAN_FLAG(bool, tag_in_free, true, "")HWASAN_FLAG(bool, print_stats, false, "")HWASAN_FLAG(bool, halt_on_error, true, "")HWASAN_FLAG(bool, atexit, false, "")// Test only flag to disable malloc/realloc/free memory tagging on startup.// Tagging can be reenabled with __hwasan_enable_allocator_tagging().HWASAN_FLAG(bool, disable_allocator_tagging, false, "")// If false, use simple increment of a thread local counter to generate new// tags.HWASAN_FLAG(bool, random_tags, true, "")HWASAN_FLAG( int, max_malloc_fill_size, 0x1000, // By default, fill only the first 4K. "HWASan allocator flag. max_malloc_fill_size is the maximal amount of " "bytes that will be filled with malloc_fill_byte on malloc.")HWASAN_FLAG( int, malloc_align_right, 0, // off by default "HWASan allocator flag. " "0 (default): allocations are always aligned left to 16-byte boundary; " "1: allocations are sometimes aligned right to 1-byte boundary (risky); " "2: allocations are always aligned right to 1-byte boundary (risky); " "8: allocations are sometimes aligned right to 8-byte boundary; " "9: allocations are always aligned right to 8-byte boundary." )HWASAN_FLAG(bool, free_checks_tail_magic, 1, "If set, free() will check the magic values " "to the right of the allocated object " "if the allocation size is not a divident of the granule size")HWASAN_FLAG( int, max_free_fill_size, 0, "HWASan allocator flag. max_free_fill_size is the maximal amount of " "bytes that will be filled with free_fill_byte during free.")HWASAN_FLAG(int, malloc_fill_byte, 0xbe, "Value used to fill the newly allocated memory.") HWASAN_FLAG(int, free_fill_byte, 0x55, "Value used to fill deallocated memory.")HWASAN_FLAG(int, heap_history_size, 1023, "The number of heap (de)allocations remembered per thread. " "Affects the quality of heap-related reports, but not the ability " "to find bugs.")HWASAN_FLAG(bool, export_memory_stats, true, "Export up-to-date memory stats through /proc")HWASAN_FLAG(int, stack_history_size, 1024, "The number of stack frames remembered per thread. " "Affects the quality of stack-related reports, but not the ability " "to find bugs.")HWASAN_FLAG(uptr, malloc_bisect_left, 0, "Left bound of malloc bisection, inclusive.")HWASAN_FLAG(uptr, malloc_bisect_right, 0, "Right bound of malloc bisection, inclusive.")HWASAN_FLAG(bool, malloc_bisect_dump, false, "Print all allocations within [malloc_bisect_left, " "malloc_bisect_right] range ")在Android中一般是通过修改全局的环境变量 HWASAN_OPTIONS 来进行hwasan的相关配置,它的实现是在build/soong/cc/sanitizer.go里面设置全局变量,然后在 system/core/rootdir/Android.mk中添加到 init.environ.rc文件中。以手中的Android 10编译hwasan后的机器为例,init.environ.rc文件配置如下
export HWASAN_OPTIONS heap_history_size=8191,stack_history_size=512,export_memory_stats=0,max_malloc_fill_size=0,verbosity=1
2、Memory与Shadow
我们知道在ARM64中,虚拟地址宽度有64位,但是并没有全部用到,目前Linux Kernel只支持最多48位的物理寻址,最大可寻址空间为256T。而虚拟地址最大宽度是动态可配的,支持 36位、39位、42位、47位等,可以在 msm-4.19/arch/arm64/Kconfig 中配置。
config ARM64_VA_BITS int default 36 if ARM64_VA_BITS_36 default 39 if ARM64_VA_BITS_39 default 42 if ARM64_VA_BITS_42 default 47 if ARM64_VA_BITS_47 default 48 if ARM64_VA_BITS_48在编译后的 out/target/product/aosp_arm64/obj/kernel/msm-4.14/.config 文件可以看到目前Android 10上 默认虚拟地址宽度为39位,页大小为 4K,用户空间地址范围为 0x0000-0000-0000-0000 ~ 0x0000-007f-ffff-ffff。
所以关于Hwasan的memory以及shadow初始化其实就是将0x0000-0000-0000-0000 ~ 0x0000-007f-ffff-ffff 这512G的用户空间地址进行划分,代码实现是在 toolchain/compiler-rt/lib/hwasan/hwasan_linux.cc 文件中通过 bool InitShadow() 完成,它主要工作就是将用户空间地址划分为 Hight Memory、Hight Shadow Memory、Low Memory、Low Shadow Memory 四个区域,确保任何位于Low Memory或Hight Memory区间的虚拟地址都可以通过MemToShadow()函数 映射到对应的Shadow Memory,反之任何位于Shadow Memory区间的虚拟地址也可以通过ShadowToMem()函数映射到对应的 Low Memory或Hight Memory。
以手中机器为例,最终划分后的用户空间地址布局如下:
|| [0x0000007b00000000, 0x0000007fffffffff] || High Mem = 0x500000000|| [0x0000007ab0000000, 0x0000007affffffff] || Hight Shadow = 0x50000000|| [0x0000007a30000000, 0x0000007aafffffff] || Shadow Gap = 0x80000000|| [0x0000007300000000, 0x0000007a2fffffff] || Low Shadow = 0x730000000|| [0x0000000000000000, 0x00000072ffffffff] || Low Mem = 0x7300000000__hwasan_shadow_memory_dynamic_address = 0x0000007300000000从上面用户空间地址布局可以看出不管是Hight mem还是Low mem其大小都是对应Shadow mem的16倍,最终都可以通过如下MemToShadow 和 ShadowToMem两个函数进行转换。
constexpr uptr kShadowScale = 4;constexpr uptr kShadowAlignment = 1ULL << kShadowScale;inline uptr MemToShadow(uptr untagged_addr) {
      return (untagged_addr >> kShadowScale) + __hwasan_s