一、首先,自定义loading组件(loading.vue)
<template>
  <div class="markbox" v-show="loading" style="background-color: rgba(0, 0, 0, 0.2);">
    <div class="loadEffect">
            <span></span>
            <span></span>
            <span></span>
            <span></span>
            <span></span>
            <span></span>
            <span></span>
            <span></span>
    </div>
  </div>
</template>

<script>
  export default {
    name: 'loading',
    data() {
      return {
        loading: false
      }
    },
    created() {
      var that = this;
      this.bus.$on('loading', function(data) {
        console.log("24")
        that.loading = data;
      })
    }
  }
</script>

<style>

  .markbox{
    position: absolute;
    left: 0;
    bottom: 0;
    right: 0;
    top:0;
  }
  .loadEffect {
    width: 100px;
    height: 100px;
    margin: 0 auto;
    position: relative;
    top:50%;
    margin-top: -100px;
  }

  .loadEffect span {
    display: inline-block;
    width: 16px;
    height: 16px;
    border-radius: 50%;
    background: white;
    position: absolute;
    -webkit-animation: load 1.04s ease infinite;
  }

  @-webkit-keyframes load {
    0% {
      opacity: 1;
    }

    100% {
      opacity: 0.2;
    }
  }

  .loadEffect span:nth-child(1) {
    left: 0;
    top: 50%;
    margin-top: -8px;
    -webkit-animation-delay: 0.13s;
  }

  .loadEffect span:nth-child(2) {
    left: 14px;
    top: 14px;
    -webkit-animation-delay: 0.26s;
  }

  .loadEffect span:nth-child(3) {
    left: 50%;
    top: 0;
    margin-left: -8px;
    -webkit-animation-delay: 0.39s;
  }

  .loadEffect span:nth-child(4) {
    top: 14px;
    right: 14px;
    -webkit-animation-delay: 0.52s;
  }

  .loadEffect span:nth-child(5) {
    right: 0;
    top: 50%;
    margin-top: -8px;
    -webkit-animation-delay: 0.65s;
  }

  .loadEffect span:nth-child(6) {
    right: 14px;
    bottom: 14px;
    -webkit-animation-delay: 0.78s;
  }

  .loadEffect span:nth-child(7) {
    bottom: 0;
    left: 50%;
    margin-left: -8px;
    -webkit-animation-delay: 0.91s;
  }

  .loadEffect span:nth-child(8) {
    bottom: 14px;
    left: 14px;
    -webkit-animation-delay: 1.04s;
  }
</style>
这里loading样式是css实现的 可参考文章选自己喜欢的样式
链接地址
二、在main.js中写入属性
Vue.prototype.ht = new Vue;

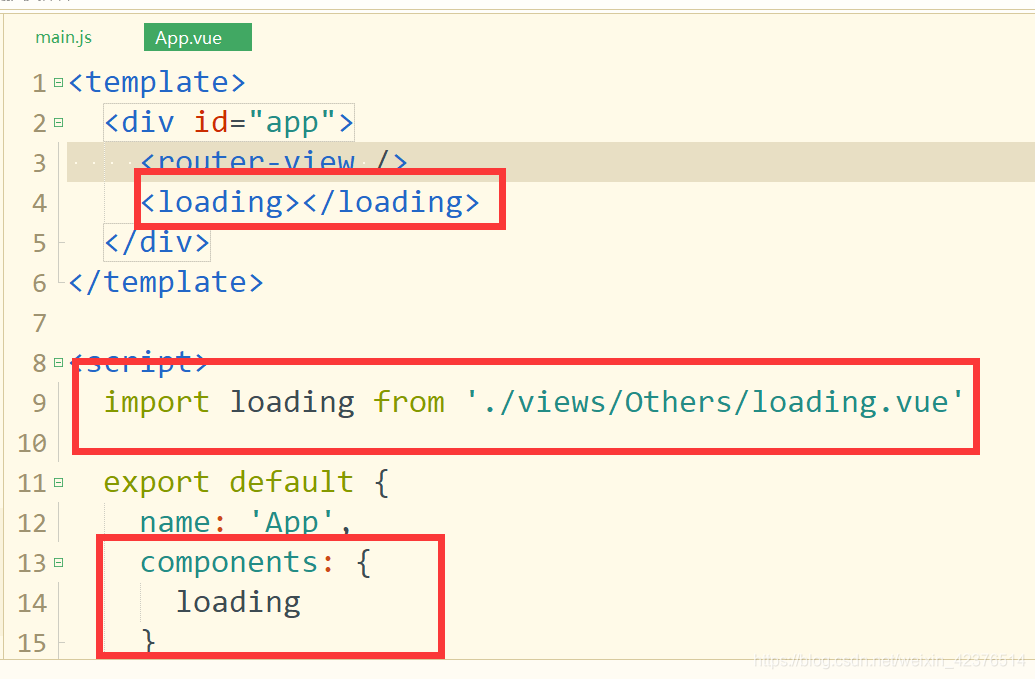
三、再到AppVue.vue中导入组件

四、然后就可以在需要显示loading的页面中的方法调用了
this.ht.$emit('loading', true); // 显示loading
/*这里写需要执行的操作,执行完后loading关闭*/
this.ht.$emit('loading', false); // 关闭loading
最后的效果

版权声明:本文为weixin_42376514原创文章,遵循 CC 4.0 BY-SA 版权协议,转载请附上原文出处链接和本声明。