本文接上篇博客:
Flume介绍、安装、使用案例、自定义Source/Sink、监控
Flume 版本:1.9.0
1.Flume负载均衡
需求:
使用 Flume-1 监控文件变动,Flume-1 将变动内容传递给 Flume-2,Flume-2 负责打印到控制台。如果 Flume-2 挂掉,Flume-1 将变动内容传递给 Flume-3,Flume-3 负责打印到控制台。
选型:
Flume-1:
taildir source
+
memory channel
+
avro sink
+
Load Balancing Sink Processor(负载均衡)
Flume-2:
avro source
+
memory channel
+
logger sink
Flume-3:
avro source
+
memory channel
+
logger sink
文档参考:
taildir source
:
http://flume.apache.org/releases/content/1.9.0/FlumeUserGuide.html#taildir-source
memory channel
:
http://flume.apache.org/releases/content/1.9.0/FlumeUserGuide.html#memory-channel
avro sink
:
http://flume.apache.org/releases/content/1.9.0/FlumeUserGuide.html#avro-sink
logger sink
:
http://flume.apache.org/releases/content/1.9.0/FlumeUserGuide.html#logger-sink
Load Balance Sink Processor
:
http://flume.apache.org/releases/content/1.9.0/FlumeUserGuide.html#load-balancing-sink-processor
2.需求分析

3.flume配置
Ⅰ.Flume-1
flume-netcat-avro-failover.conf
# Name the components on this agent
a1.sources = r1
a1.sinks = k1 k2
a1.channels = c1
a1.sinkgroups = g1

# Failover configure(负载均衡只有这三行配置与故障转移不同,其余都相同。Flume故障转移来这里:https://blog.csdn.net/lzb348110175/article/details/118220586)
a1.sinkgroups.g1.processor.type = load_balance
a1.sinkgroups.g1.processor.backoff = true
a1.sinkgroups.g1.processor.selector = random

# Describe/configure the source
a1.sources.r1.type = TAILDIR
a1.sources.r1.positionFile = /opt/module/flume/position/taildir_failover_position.json
a1.sources.r1.filegroups = f1
a1.sources.r1.filegroups.f1 = /opt/module/testdir/test.log

# Describe the sink
a1.sinks.k1.type = avro
a1.sinks.k1.hostname = 192.168.204.202
a1.sinks.k1.port = 41414

a1.sinks.k2.type = avro
a1.sinks.k2.hostname = 192.168.204.203
a1.sinks.k2.port = 41414

# Use a channel which buffers events in memory
a1.channels.c1.type = memory
a1.channels.c1.capacity = 1000
a1.channels.c1.transactionCapacity = 100

# Bind the source and sink to the channel
a1.sinkgroups.g1.sinks = k1 k2
a1.sources.r1.channels = c1
a1.sinks.k1.channel = c1
a1.sinks.k2.channel = c1
Ⅱ.Flume-2
flume-avro-logger.conf
# Name the components on this agent
a1.sources = r1
a1.sinks = k1
a1.channels = c1

# Describe/configure the source
a1.sources.r1.type = avro
a1.sources.r1.bind = 192.168.204.202
a1.sources.r1.port = 41414

# Describe the sink
a1.sinks.k1.type = logger

# Use a channel which buffers events in memory
a1.channels.c1.type = memory
a1.channels.c1.capacity = 1000
a1.channels.c1.transactionCapacity = 100

# Bind the source and sink to the channel
a1.sources.r1.channels = c1
a1.sinks.k1.channel = c1
Ⅲ.Flume-3
flume-avro-logger.conf
# Name the components on this agent
a1.sources = r1
a1.sinks = k1
a1.channels = c1

# Describe/configure the source
a1.sources.r1.type = avro
a1.sources.r1.bind = 192.168.204.203
a1.sources.r1.port = 41414

# Describe the sink
a1.sinks.k1.type = logger

# Use a channel which buffers events in memory
a1.channels.c1.type = memory
a1.channels.c1.capacity = 1000
a1.channels.c1.transactionCapacity = 100

# Bind the source and sink to the channel
a1.sources.r1.channels = c1
a1.sinks.k1.channel = c1
4.启动命令
注意:
必须先启动 Flume-2 和 Flume-3,再启动 Flume-1。如果先启动 Flume-1,会报错误:Connection refused: /192.168.204.202:41414 和 Connection refused: /192.168.204.203:41414
提示:
Flume-2 和 Flume-3 根据配置的负载均衡策略
a1.sinkgroups.g1.processor.selector
进行负载,如果Flume-3关闭了,name所有sink都到 Flume-2。这就是Flume负载均衡。
# Flume-2 启动命令
bin/flume-ng agent -c conf -n a1 -f job/loadbalance/flume-avro-logger.conf -Dflume.root.logger=INFO,console
# Flume-3 启动命令
bin/flume-ng agent -c conf -n a1 -f job/loadbalance/flume-avro-logger.conf -Dflume.root.logger=INFO,console
# Flume-1 启动命令
bin/flume-ng agent -c conf -n a1 -f job/loadbalance/flume-taildir-avro-loadbalance.conf
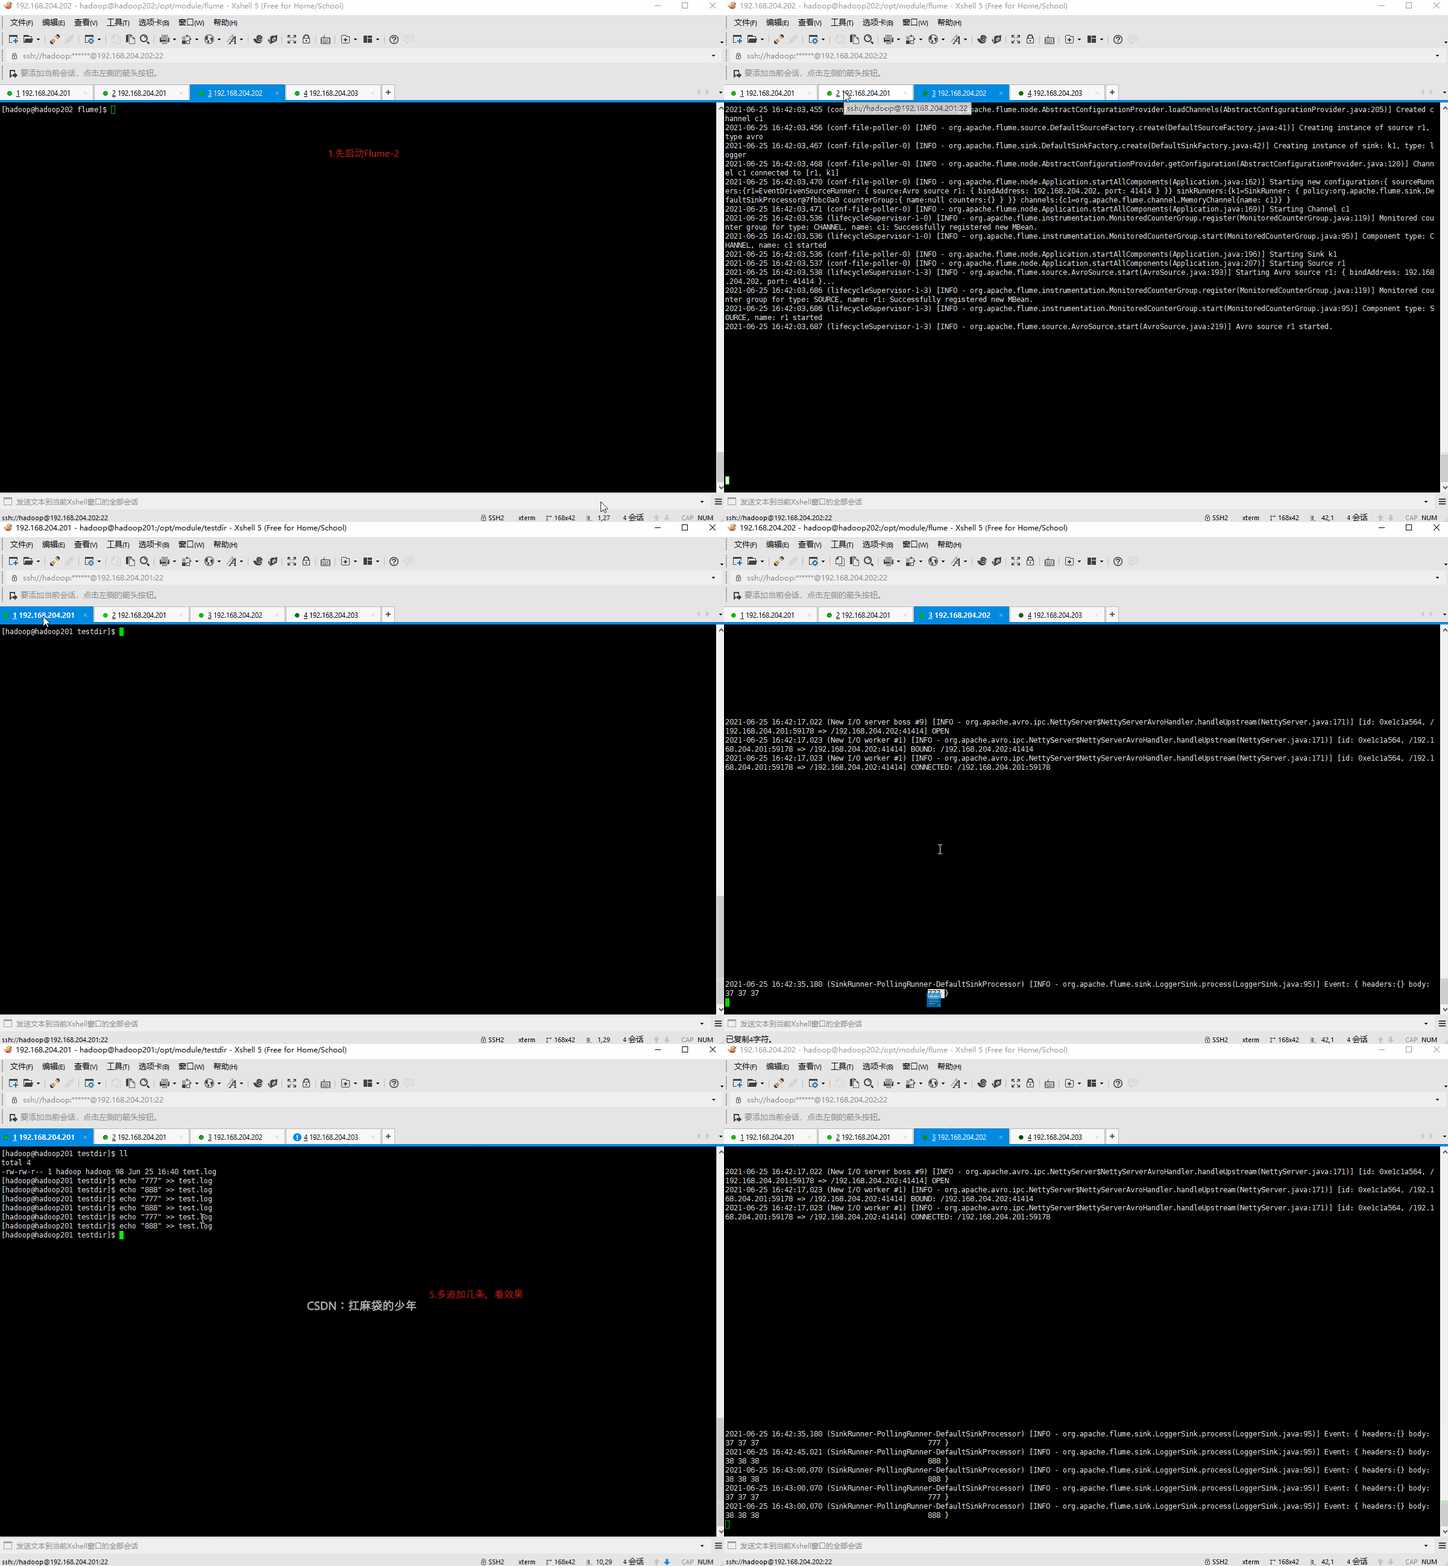
5.测试图示
Taildir Source 实时监听
testdir/test.log
echo 方式追加数据至
test.log
文件,模拟实时日志;
Flume-2 和 Flume-3 根据负载均衡规则,logger sink 输出至控制台
测试结果,如图所示:

博主写作不易,加个关注呗
求关注、求点赞,加个关注不迷路 ヾ(◍°∇°◍)ノ゙
我不能保证所写的内容都正确,但是可以保证不复制、不粘贴。保证每一句话、每一行代码都是亲手敲过的,错误也请指出,望轻喷 Thanks♪(・ω・)ノ